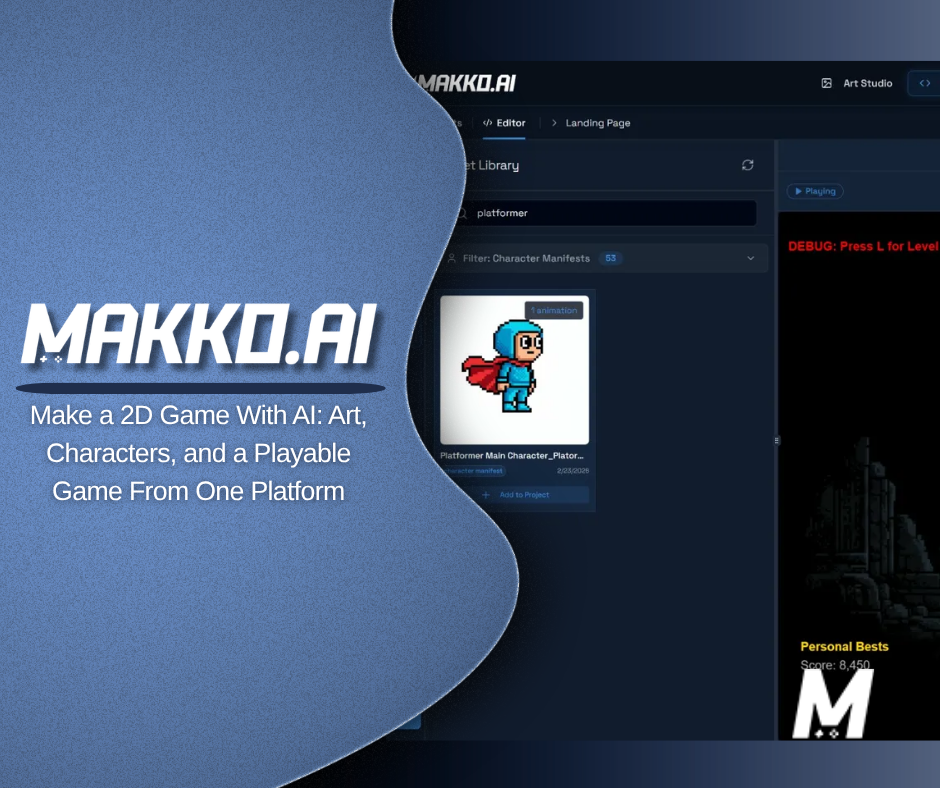
Make a 2D Game With AI: Art, Characters, and a Playable Game From One Platform
Making a 2D game with AI is a pipeline decision, not a single tool decision. This is the complete Makko workflow — building the visual world in Art Studio, then turning that art into a playable game in Code Studio, all without writing code or drawing anything by hand.

Making a 2D game with AI is not a single tool decision. It is a pipeline decision. The question is not just which AI can generate a character or write some game logic — it is whether the tools you are using connect to each other in a way that gets you from an idea to a playable game without rebuilding your workflow from scratch at every step.
This article covers the complete pipeline for making a 2D game with AI using Makko — from the first concept art generation through to a live playable game. The Flashlight Platformer is the working example throughout: a complete 2D browser game built without writing code and without drawing a single asset by hand.
The pipeline has two stages. The first is the art stage — building the visual world your game takes place in. The second is the game stage — describing your game's mechanics and behavior and letting the AI build the playable version. What makes this pipeline different from assembling tools from different sources is that both stages live inside the same platform, share the same asset library, and connect without any manual file transfer or reformatting between them.
The Two Stages of Making a 2D Game With AI
Most discussions about making games with AI focus on one stage at a time. Either the conversation is about generating game art — characters, backgrounds, animations — or it is about using AI to write game logic. The two conversations rarely connect, which is why most creators end up with either impressive-looking assets they cannot easily turn into a game, or a functional game prototype that uses placeholder art they never replace.
The Makko pipeline treats both stages as part of the same workflow. Art Studio handles the visual layer — generating and refining all the art assets your game needs. Code Studio handles the game layer — building the mechanics, logic, and behavior that make the art interactive. The two environments share the same Asset Library, which means every character and background you build in Art Studio is immediately available in Code Studio without any export or import step.
Understanding what each stage requires — and what the AI needs from you at each step — is the difference between a project that comes together cleanly and one that stalls halfway through because the tools do not connect.
Stage One: Building the Visual World
The art stage always starts with a Collection. A Collection is the project container for your game's entire visual world inside Art Studio. Create one, name it after your game, and generate concept art that establishes the visual direction — the mood, the color palette, the overall aesthetic. This concept art becomes the reference foundation for every asset you generate afterward.
For the Flashlight Platformer, the concept art established a dark underground world — stone corridors, flickering torch light, a visual language that was atmospheric and slightly ominous without being graphically violent. That direction was locked in during the first generation session and referenced by every subsequent asset in the project. The main character, the enemy designs, the background tiles, the prop objects — all of them were generated using those concept images as AI Reference Guidance, which is how a game ends up with a coherent visual identity rather than a collection of individually good-looking assets that do not match each other.
The art production sequence inside a Collection follows a natural order. Concept art first — this establishes the foundation. Characters next — these are the entities that will be animated and controlled. Backgrounds and props after that — these are the environments and objects the characters move through and interact with. Animations last — these are generated using the finished character designs as visual reference, which keeps the animated versions consistent with the still character you built.
Every generation in Art Studio uses the same four controls: AI Reference Images (the concept art guiding this specific generation), Asset Type (Character, Background, or Prop — which determines technical output format), Art Style (one of twelve options including 16-Bit Pixel Art, HD Pixel Art, Anime Character, and more), and Images Per Prompt. The critical discipline throughout the art stage is keeping the Art Style consistent across every generation in the Collection. Change it and the visual coherence breaks. Keep it and the game looks designed rather than assembled.
The Iterate workflow handles refinement at every step. The first result of any generation is a starting point. Click the image, describe what needs to change, generate again. The iteration history stacks so you can compare versions and select the right one. Save the finished result to the Collection's reference art and it becomes available as a style anchor for future generations — the system gets more accurate the more you put into it.
The Consistency Problem — Why Most AI Game Art Pipelines Break Down
The most common failure mode when making a 2D game with AI is visual inconsistency. Each AI generation is a fresh interpretation of a text prompt. Without a structural system anchoring all generations to the same visual direction, assets drift — the hero character looks like it came from a different game than the background, the enemies look like they came from a different game than the hero. Individually generated, individually impressive, visually incompatible.
This is the consistent game art problem. General AI image tools like Midjourney and Leonardo do not have a structural answer to it. Single-asset game art tools like PixelLab and AutoSprite solve their specific output type well but have no mechanism for connecting their outputs to each other visually. The consistency burden falls entirely on the creator — detailed style instructions in every prompt, manual reference image management, and increasing difficulty as the asset count grows.
The Collections system solves this structurally. Every generation in a Collection references the same concept art foundation. The AI is not interpreting each new prompt from scratch — it is working from an established visual anchor. The style does not drift because the reference does not change. This is why the Flashlight Platformer's characters, backgrounds, props, and animations all look like they were made by the same artist — not because of prompting skill, but because of how the system is structured.
Sub-collections extend this further. The Flashlight Platformer uses separate sub-collections for the player character, enemies, backgrounds, and props. Each sub-collection draws from the same parent Collection concept art. Every enemy in the enemy sub-collection looks like it belongs in the same enemy faction. Every background in the background sub-collection looks like it belongs in the same world. The organization is not just for tidiness — it is for coherence.
What the Art Stage Produces
By the end of the art stage, a complete 2D game project should have four categories of assets ready.
Concept art. The visual foundation images that were generated first and used as AI Reference Guidance throughout the project. These are not typically used in-game directly — they are the style anchors that made everything else consistent.
Characters. The player character, enemies, and any NPCs, each with transparent backgrounds and game-ready formatting. For the Flashlight Platformer this includes the main player character and two enemy types, each generated in 16-Bit Pixel Art style against the same concept art reference.
Backgrounds and props. The tileable environment backgrounds and the objects that populate the game world. Stone corridor tiles, archway backgrounds, torch props, spike obstacles — all in matching 16-Bit Pixel Art style with transparent backgrounds on props for correct game engine layering.
Animations. The sprite sheets for each character's movement states. Run, jump, idle, attack — generated using the character's concept art as visual reference so the animated version matches the still character. Each animation loop cleaned in the frame editor before baking to ensure smooth playback in-game.
All of these assets are automatically available in the Asset Library the moment they are saved. Nothing needs to be exported from Art Studio or imported into Code Studio. The pipeline between the two environments is seamless.

Stage Two: From Art to Playable Game
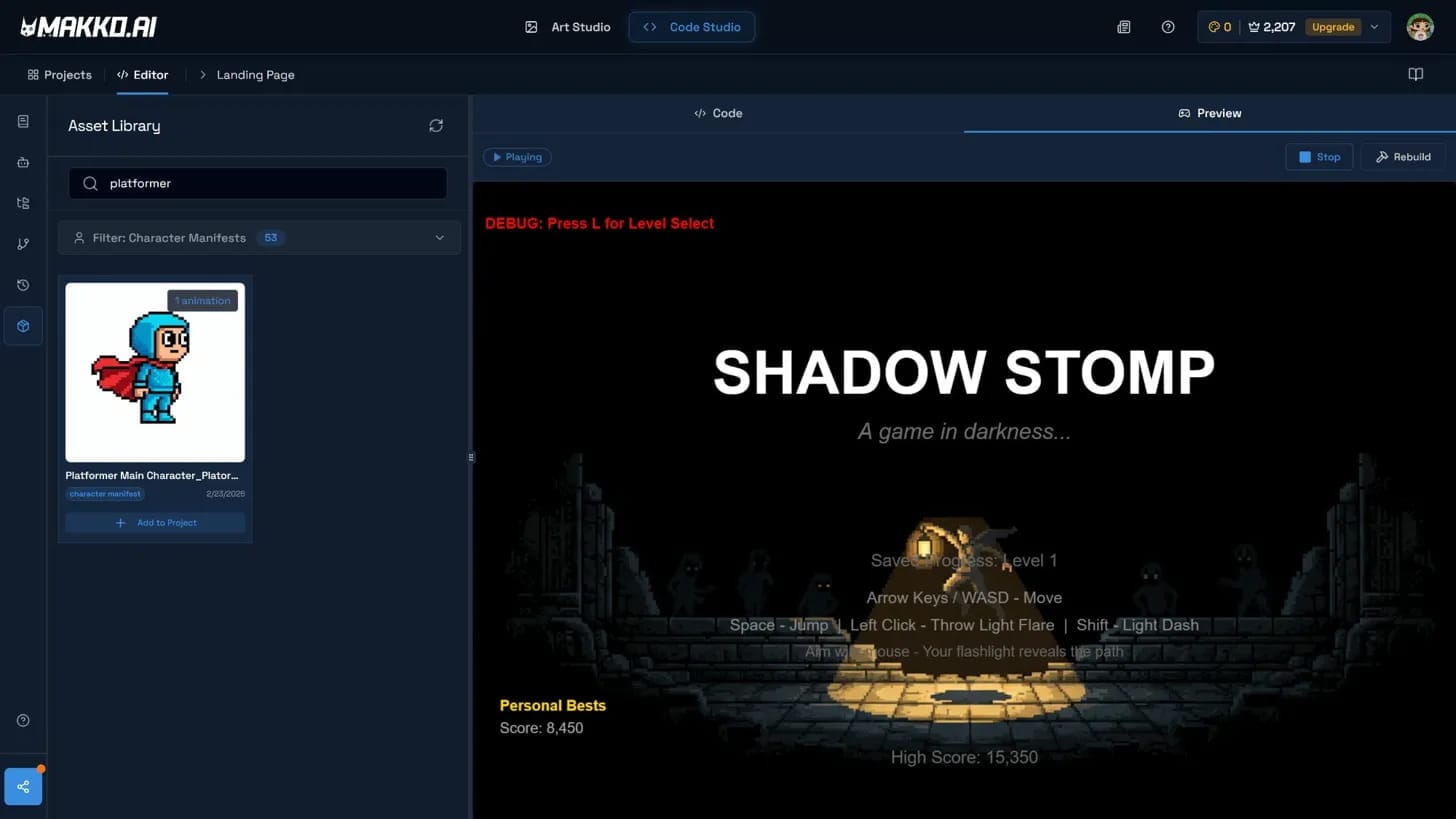
With the art stage complete, the game stage begins in Code Studio. The transition is immediate — switch to Code Studio using the top navigation bar and the Asset Library on the left panel already contains every character, background, prop, and animation you built in Art Studio. No file transfer. No import dialog. No reformatting. The art you made is available as game assets the moment you open Code Studio.
Code Studio operates on intent-driven game development — you describe what you want your game to do in plain language, and the AI interprets that intent, plans the required systems, and builds them. You do not write scripts. You do not configure state machines. You describe behavior and the AI implements it.
For the Flashlight Platformer, the game description covered the core loop: a side-scrolling platformer where the player character moves through dark corridors using a flashlight mechanic, avoiding or defeating enemies, collecting items, and navigating levels. That description — written in plain language in the Code Studio chat — was enough for the AI to build a working prototype with the correct physics, collision detection, enemy behavior, and level structure.
The assets from Art Studio connect directly to the game logic the AI builds. The player character animation states — run, jump, idle, light-throw — are wired to the movement and action triggers the AI created. The enemy characters are assigned the behavior patterns described in the game prompt. The background tiles are placed in the level layout. Everything connects because everything came from the same pipeline.
Iteration in Code Studio follows the same pattern as Art Studio. The first build is a starting point. Describe what needs to change — "make the enemy patrol a shorter distance," "increase the jump height," "add a score counter to the top of the screen" — and the AI rebuilds with those changes applied. Each iteration refines the game without requiring you to touch a single line of code. The creative direction stays with you. The implementation stays with the AI.
Why the Connected Pipeline Matters
The alternative to a connected pipeline is a disconnected one. Generate art in one tool, export it, reformat it for your game engine, import it, wire it manually to your game logic. That process works, and many solo developers run exactly that workflow. But every handoff between tools is a point where the project can stall — wrong file format, incorrect transparency, animation frames that do not map to the state machine you built.
A connected pipeline removes those handoffs. The Asset Library is shared between Art Studio and Code Studio at the platform level. When you save an asset in Art Studio it is available in Code Studio immediately. When the AI in Code Studio references a character or background it is pulling from the same asset set you built, not a copy you exported and imported. The fidelity between what you created and what appears in the game is exact because they are the same file.
This is what makes Makko an AI 2D game maker rather than a collection of AI tools that happen to serve game development. The distinction is not marketing — it is architectural. The art pipeline and the game pipeline are the same pipeline, and the gap between "I have a complete art library" and "I have a playable game" is a single session in Code Studio rather than days of manual integration work.
Who This Pipeline Is Built For
The Makko pipeline is built for three types of creators, and the pipeline serves each of them differently.
The non-technical creator who has a game idea and no background in either art or programming. For this person the pipeline is the entire production stack — concept art to characters to backgrounds to animations to playable game, all inside one platform, all driven by description rather than technical skill.
The developer who cannot draw. Someone comfortable building game logic but blocked by the art production requirement. For this person Art Studio removes the art bottleneck entirely — the full visual layer of the game can be produced through description and iteration, and the assets drop directly into the game environment they are already working in.
The artist who cannot code. Someone with strong visual instincts who can produce compelling game art but has no path to turning that art into a playable game. For this person Code Studio is the missing piece — the ability to describe game behavior in plain language and have the AI implement it, using the art they already built as the visual foundation.
In all three cases the core value is the same: the gap between idea and playable game is significantly smaller when both the art pipeline and the game pipeline are handled by AI from within the same platform. The creator directs. The AI executes. The game gets built.
The Complete Pipeline: Art to Game in Sequence
- Create a Collection in Art Studio. Name it after your game.
- Generate concept art. Describe the world's mood, color, and visual atmosphere. Save the best results as the Collection's reference foundation.
- Create character sub-collections. Generate player character, enemies, and NPCs using concept art as AI Reference Guidance. Iterate until each character is right. Save to reference art.
- Create background and prop sub-collections. Generate each using the same art style and concept art references. Props receive transparent backgrounds automatically.
- Generate animations for each character. Use the character's concept art as visual reference. Clean each animation loop in the frame editor before baking the sprite sheet.
- Switch to Code Studio. All Art Studio assets are immediately available in the Asset Library.
- Describe your game in the Code Studio chat. The AI builds a playable prototype using your assets and the mechanics you described.
- Iterate. Describe what needs to change. The AI rebuilds. Repeat until the game plays the way you want.
For detailed walkthroughs and live feature demos, visit the Makko YouTube channel.
Related Reading
- AI Game Art Generator: Characters, Backgrounds, Animations and Why Consistency Is the Hard Part
- How to Make a Game Without Coding: The Complete AI Walkthrough
- What Is Makko Art Studio? The AI Game Asset Generator Built for Game Developers
- Can You Make a Game With AI Without Coding? (Real Examples)
- AI Game Generator vs Game Engine: What You Are Actually Choosing