Why Solo Devs Don't Finish Their Games (And How to Fix the Art Problem)
Most solo devs quit because they can't draw. Makko Art Studio removes that barrier. Build animated game characters from a text description.

Most solo developers who abandon their games tell themselves the same story. They ran out of motivation. The scope got too big. Life got in the way. Those things are real, but they are usually symptoms of a more specific problem that sits underneath all of them: the game required both a programmer and an artist, and they were only one of those things.
Indie game development is a two-discipline job. Writing game logic is one skill set. Creating characters, backgrounds, objects, and animations is a completely different one. Most solo developers are strong in one and weak in the other. The ones who can code often cannot draw. The ones who can draw often cannot build game systems. And when the project reaches the point where the missing skill becomes unavoidable, the project stalls.
This is not a motivation problem. It is a production gap. And unlike motivation, a production gap has a specific answer.
This article covers why the art barrier is the most common reason solo developers abandon projects, and how Makko's Art Studio removes it: from a text description to a fully animated, game-ready character without drawing a single frame. The walkthrough builds Jax, a playable character from Sector Scavengers, start to finish.
The Two-Discipline Problem Nobody Talks About
Game development tutorials treat art and code as separate tracks because they are. Most courses teach one or the other. Most tools are built for one or the other. But finishing a game requires both, which means the solo developer either has to learn the second discipline from scratch, commission someone who has it, or find a way to close the gap without doing either.
Learning the missing skill is the advice most people give. It is also the advice most people do not follow, because learning to draw when you already know how to code is a multi-year investment that competes directly with the time it takes to build the game you actually want to make. Most developers who start down that road stop when they realize the learning curve is longer than the project itself.
Hiring an artist is the other common suggestion. For a hobby project or an indie game without funding, this means spending money on a game that has not proven it is worth spending money on yet. It also creates a dependency: if the art is blocked, the game is blocked.
Neither solution actually works for the majority of solo developers. What they need is a way to produce production-quality game art from the skills they already have, without learning to draw and without hiring anyone. That is the gap the art barrier represents. And that is what this video covers.
What the Art Barrier Actually Looks Like Mid-Project
The art barrier does not show up on day one. It shows up at the worst possible moment: when the game logic is working and the project should feel like it is gaining momentum.
A developer who can code will often get surprisingly far on placeholder art. Simple colored rectangles for characters, flat color backgrounds, no animations. The systems work. The game loop runs. The mechanics feel right. And then playtesting reveals what was already true: it does not feel like a game yet because it does not look like one. Real players have a hard time engaging with something that looks like a debugging session.
That is when the art problem becomes impossible to defer. Not because the developer chose the wrong time to address it, but because there was never a good time in the traditional workflow. The game needed art from the beginning. The developer could not make art. So they put it off until the problem became unavoidable.
At this point the options narrow quickly. Commission art and wait on someone else's timeline. Use asset packs and accept that the game looks like it was built from a stock library. Learn to draw, a multi-year skill investment for a problem that needs solving now. Or quietly stop working on the project until a solution appears. Most projects choose the last option by default. That is how they die without anyone deciding to kill them.
The art barrier is uniquely damaging because it arrives after significant investment. A developer who hits it has already built something real. They understand the game well enough to build it. They are not abandoning the project because it was a bad idea. They are abandoning it because the next required step is one they cannot take.
What an AI Game Art Generator Actually Changes
The phrase AI game art generator gets used loosely to describe a wide range of tools, most of which solve only part of the problem. General AI image tools produce impressive single images that still require significant manual work before they are usable in a game: background removal, format conversion, frame slicing for animation. They close the drawing gap but leave the production gap wide open.
A purpose-built game art generator does something different. It produces assets that are game-ready before they leave the tool: transparent backgrounds, animation-ready frames, correct file formats, and visual consistency across every asset in the project. The developer describes what they want. The tool produces something that goes directly into the game without another application in the middle.
For a solo developer who can code but cannot draw, this changes the timeline of the entire project. Art no longer has to wait for a skill that takes years to build or a budget that may not exist. It can be produced now, at the same pace as the code, from the same platform. The two-discipline problem does not disappear, but the second discipline no longer requires a second person.
The skill it replaces is not creativity. A purpose-built game art generator amplifies creative direction: it executes on what the developer describes. The developer still decides what the character looks like, what the world feels like, what art style fits the tone. The AI handles the execution. That division of labor is what makes it genuinely useful for solo development rather than just interesting as a technology.
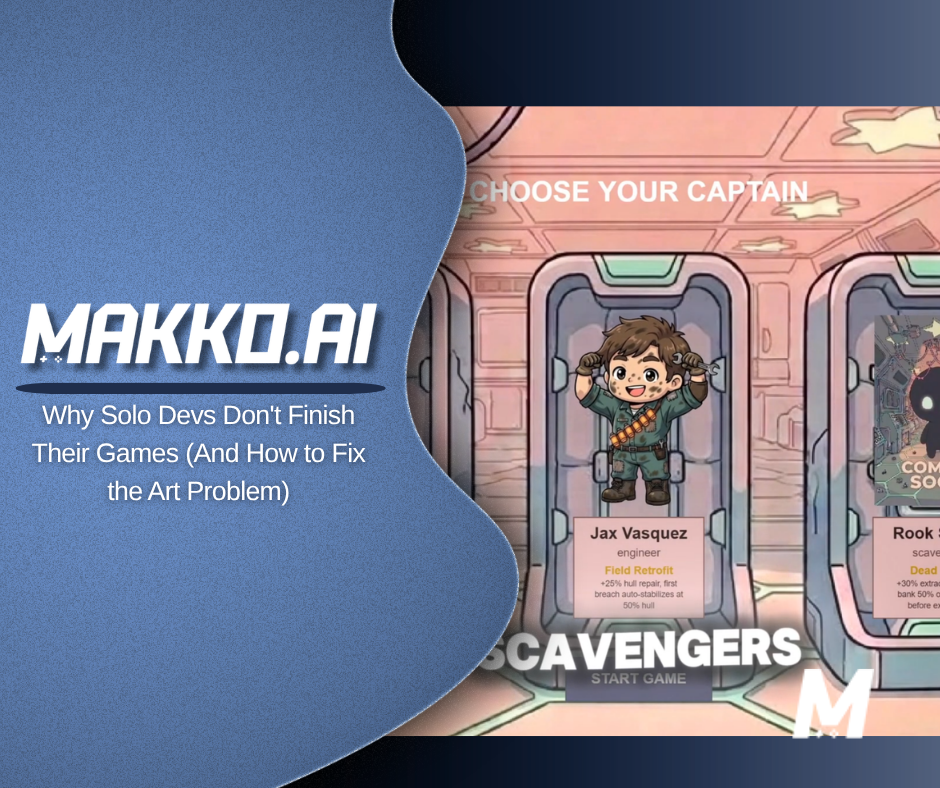
The walkthrough below builds Jax, a playable character from Sector Scavengers, from a text description to an animated character inside a live game. No drawing. No separate animation software. No file transfers between tools.
Step 1: Context Before Characters
The single most common mistake when using an AI character generator for the first time is going straight to character generation. The better move is to build the visual foundation first.
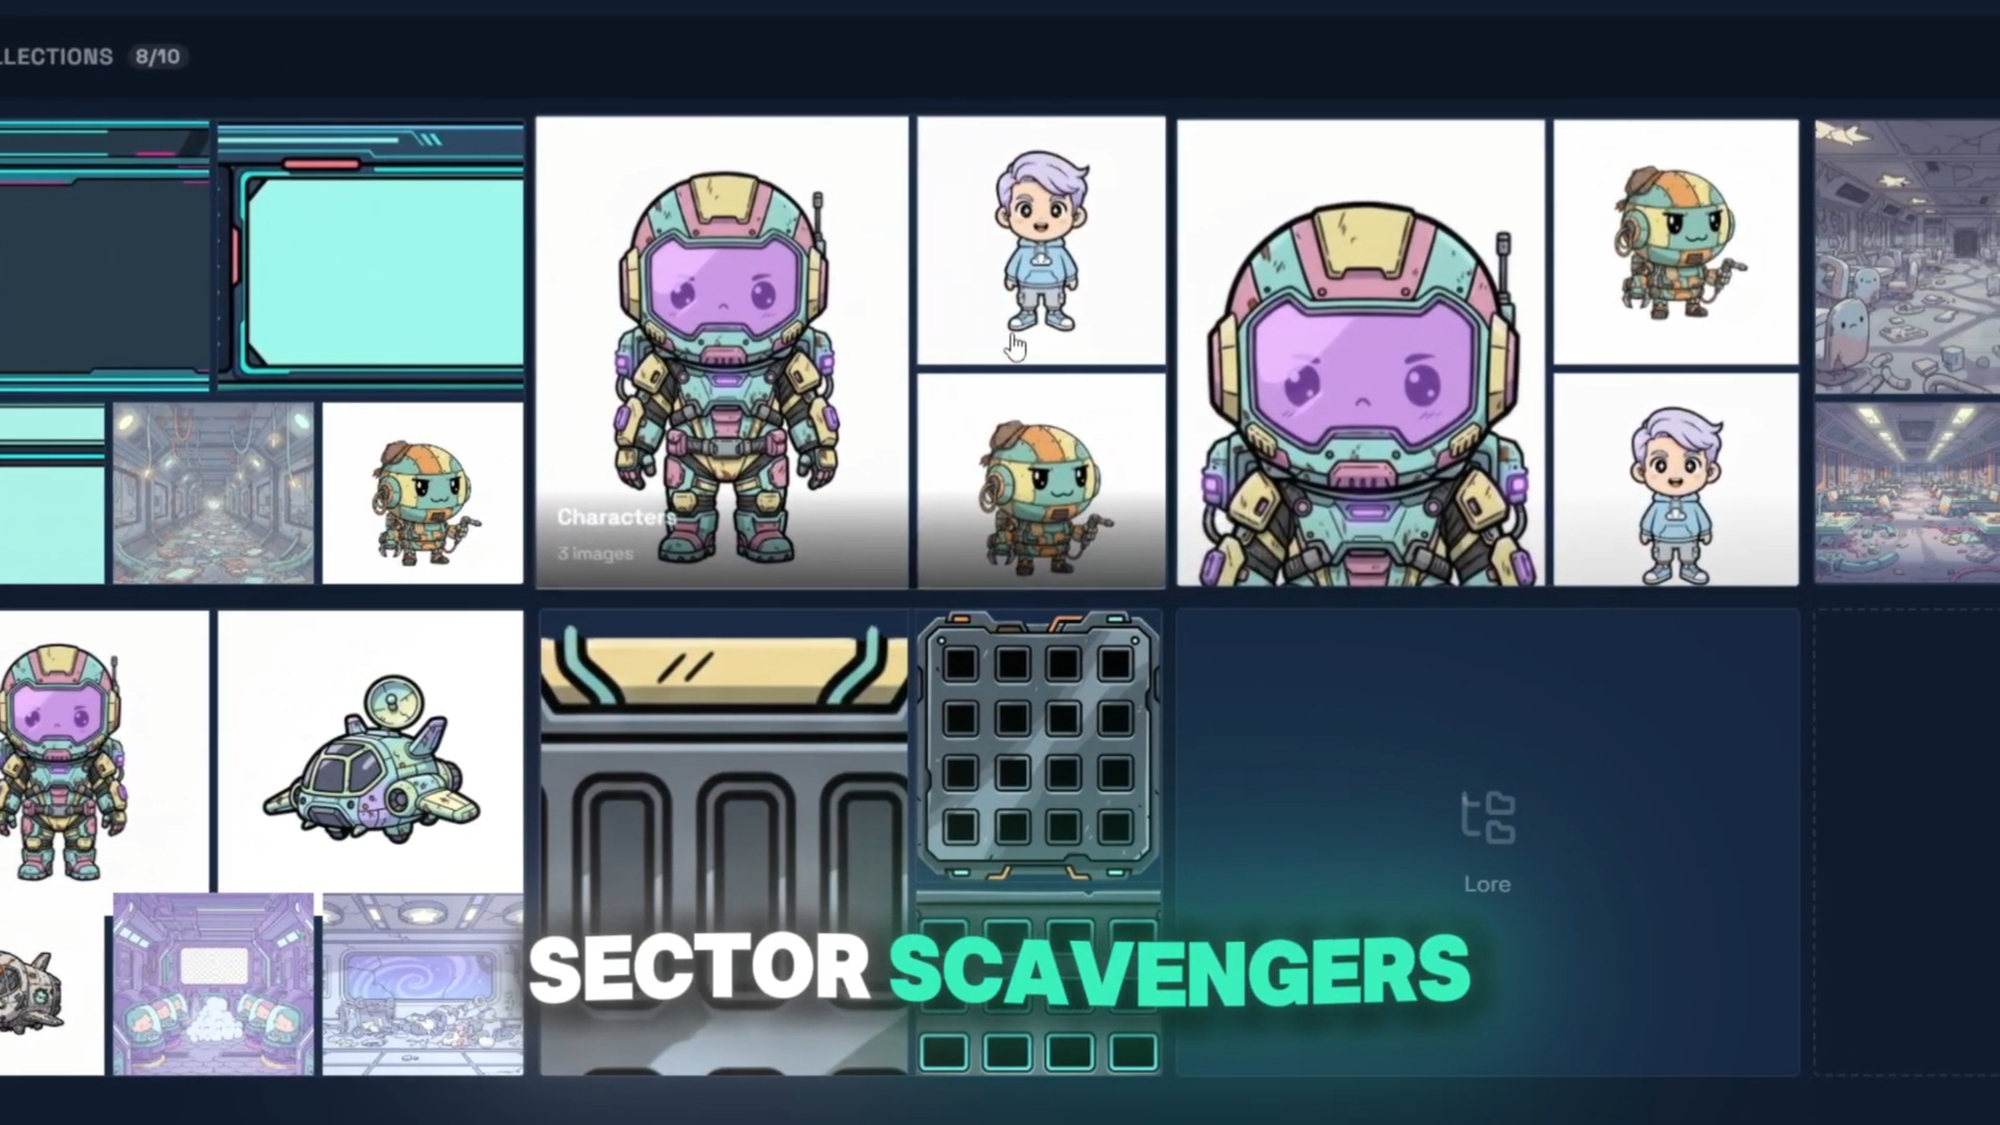
In Art Studio, every game project starts with a Collection. A Collection is the project container for your game's entire visual world. You create one, name it after the game, and generate concept art that establishes the visual direction: the mood, the color palette, the overall aesthetic. That concept art becomes the reference foundation for every asset you generate afterward.
For Sector Scavengers, the concept art established a chibi-influenced sci-fi style with a specific color palette and level of detail. Every character generated after that referenced this foundation. That is what keeps the game looking like one cohesive world rather than a collection of separately generated assets.
Step 2: Describe the Character
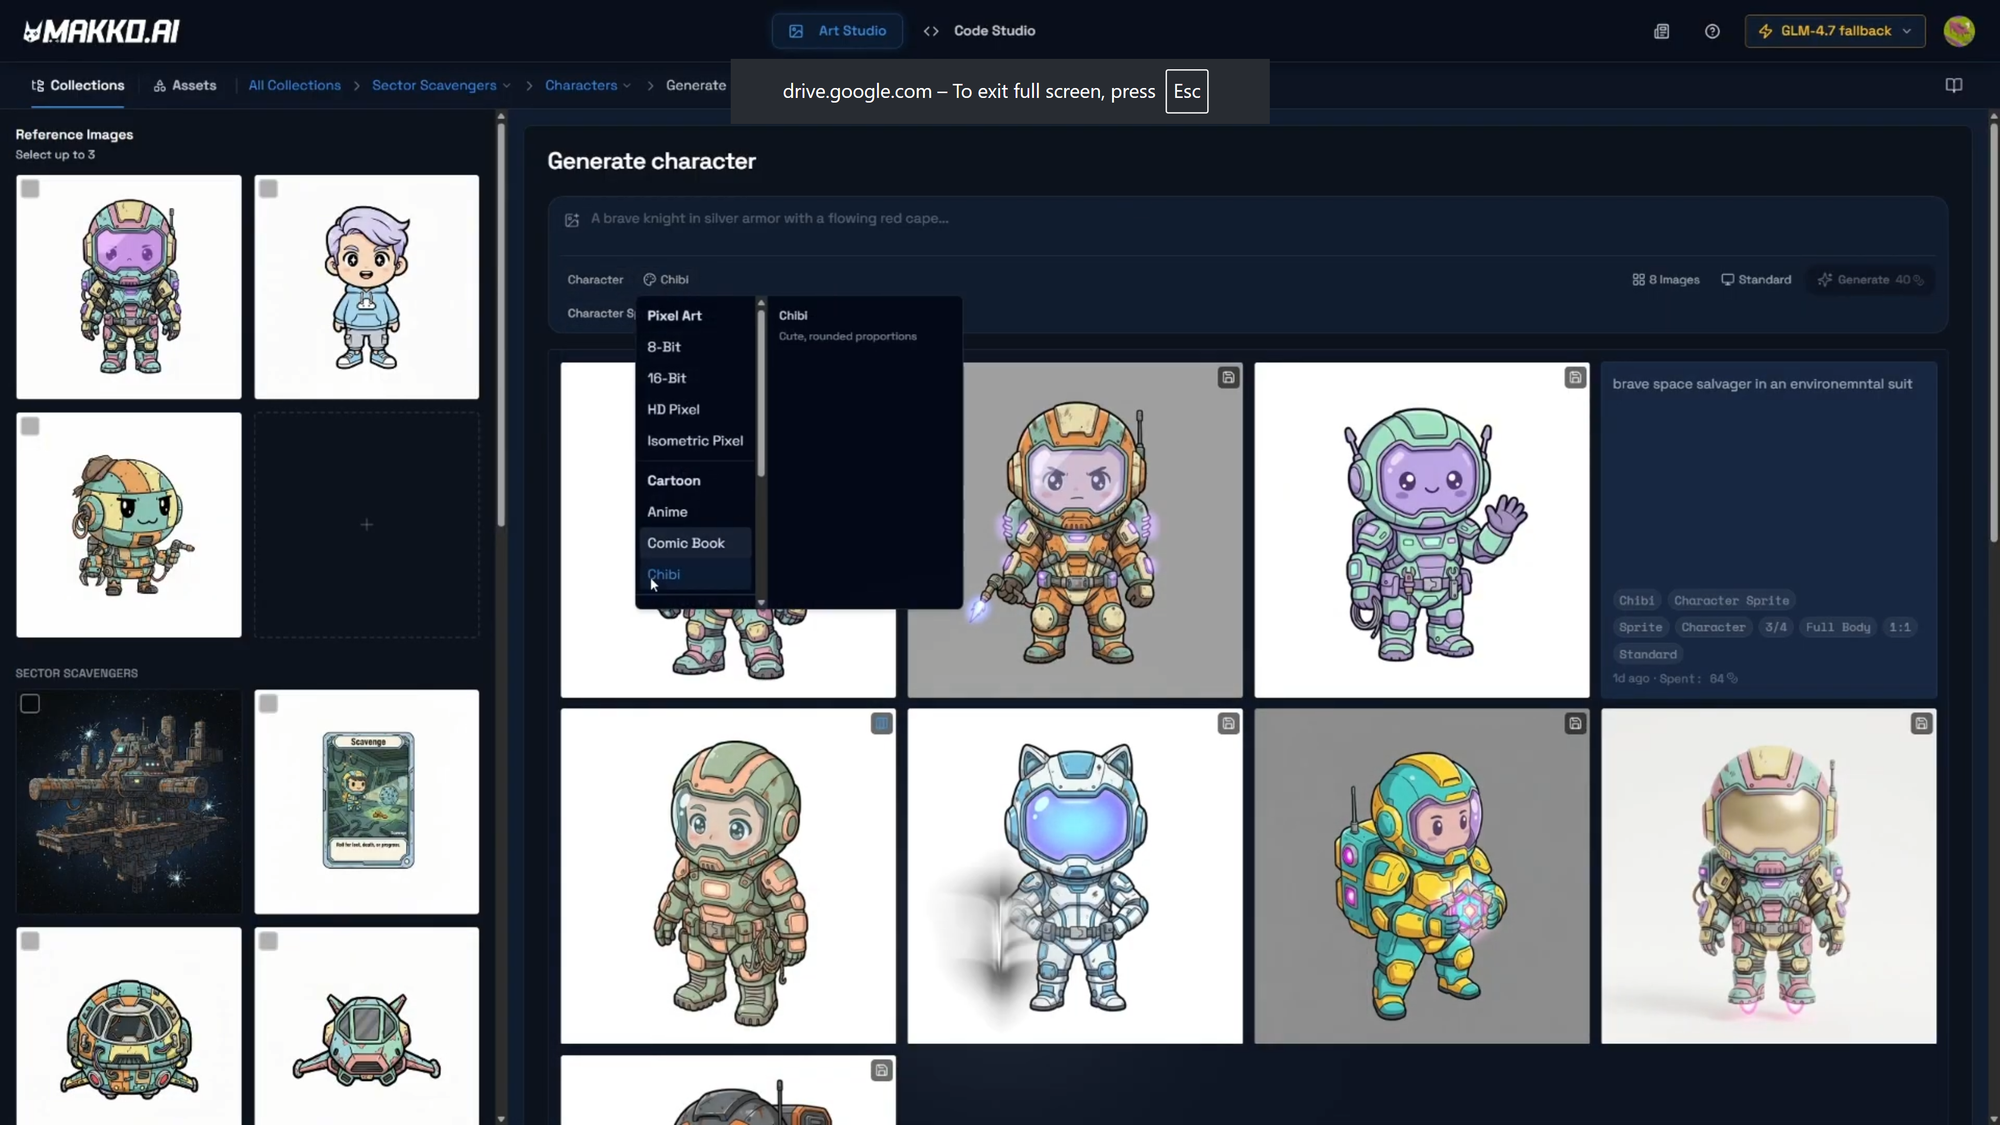
With concept art in the Collection, the character generation begins. Inside a Characters sub-collection, concept images are selected as AI Reference Images, the Art Style is confirmed, and the Character Sprite preset is applied automatically. This preset tells the tool to produce game-ready output: transparent background, three-quarter full-body view, sprite-ready format.
Then the prompt. Jax is described in plain language: his role in the game, his visual identity, his gear, what makes him look like he belongs in this world. The AI generates multiple variations in a single pass. Each one reflects both the prompt and the concept art selected as reference, which is how the output lands in the right visual territory rather than somewhere generic.
This is the moment the art barrier disappears. A developer who could not draw Jax can describe Jax. The description is the skill. The AI handles the execution.
Step 3: Iterate Until It Is Right
The first generation result is a starting point, not a final output. The Iterate workflow is where the character gets refined. Click on any generated image, describe exactly what needs to change: silhouette, gear detail, proportions, color. The AI applies only that change and leaves everything else alone. Each iteration stacks in a carousel so you can compare versions and go back to any previous result.
This is not failure. Iteration is the intended workflow. Generate. Evaluate. Refine. The developer stays in the role of creative director throughout: giving direction, the AI executing, the developer deciding when it is right. When Jax looks the way he should, he is saved to the Collection's reference art. From that point forward he becomes part of the visual anchor for every future generation inside the Collection.
Step 4: The Reference Sheet
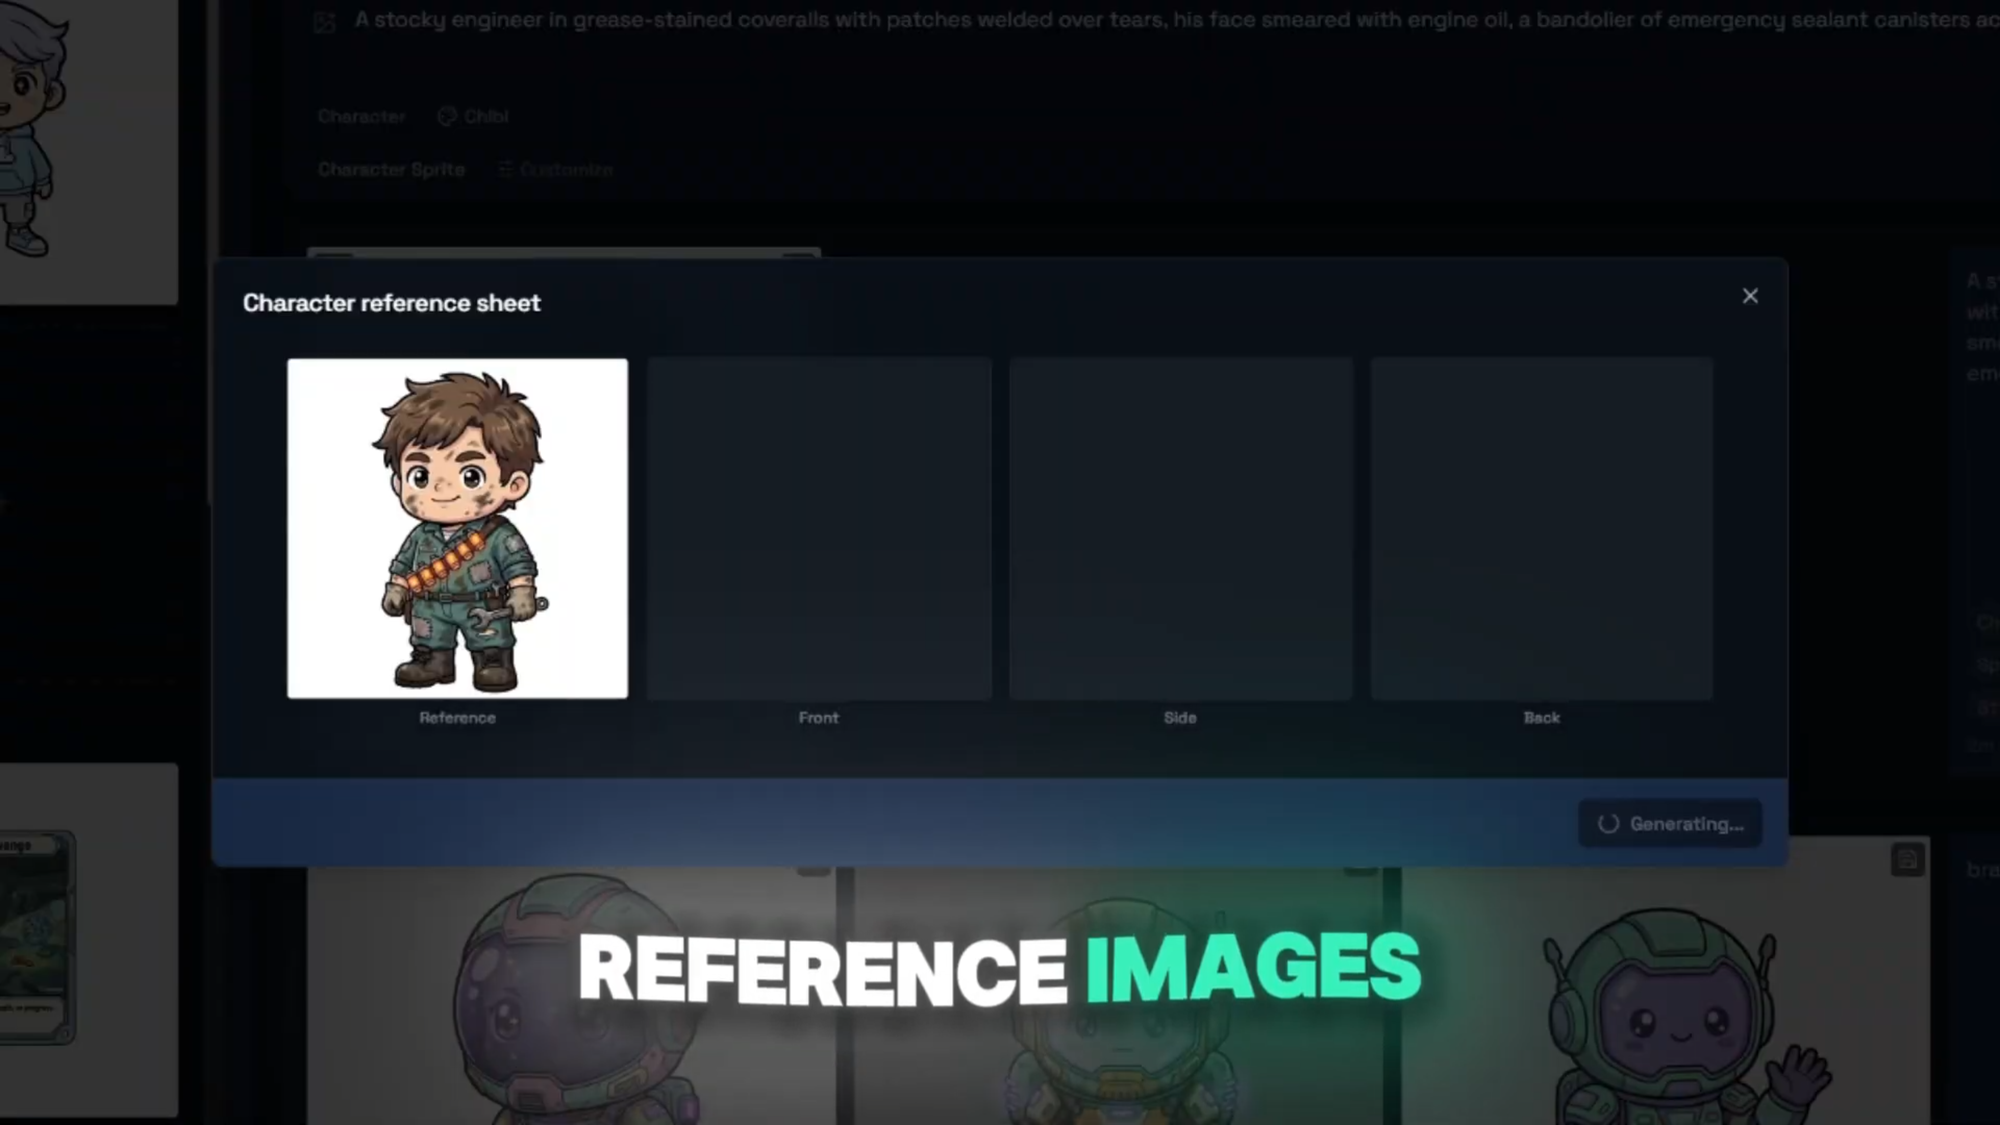
When a character is saved, Art Studio immediately prompts for a Reference Sheet: three views of the same character, front, side, and back. This step is not optional for any character that will be animated. The Reference Sheet gives the AI the multi-angle information it needs to generate consistent animation frames. Without it, animated versions can drift visually from the still character.
The Reference Sheet costs 12 credits and takes a single generation pass. When all three views come back consistent with the character sprite, the character is named and saved. Jax is now a permanent part of the Collection. His Character Details page becomes the single source of truth for every animation, sprite sheet, and manifest that follows.
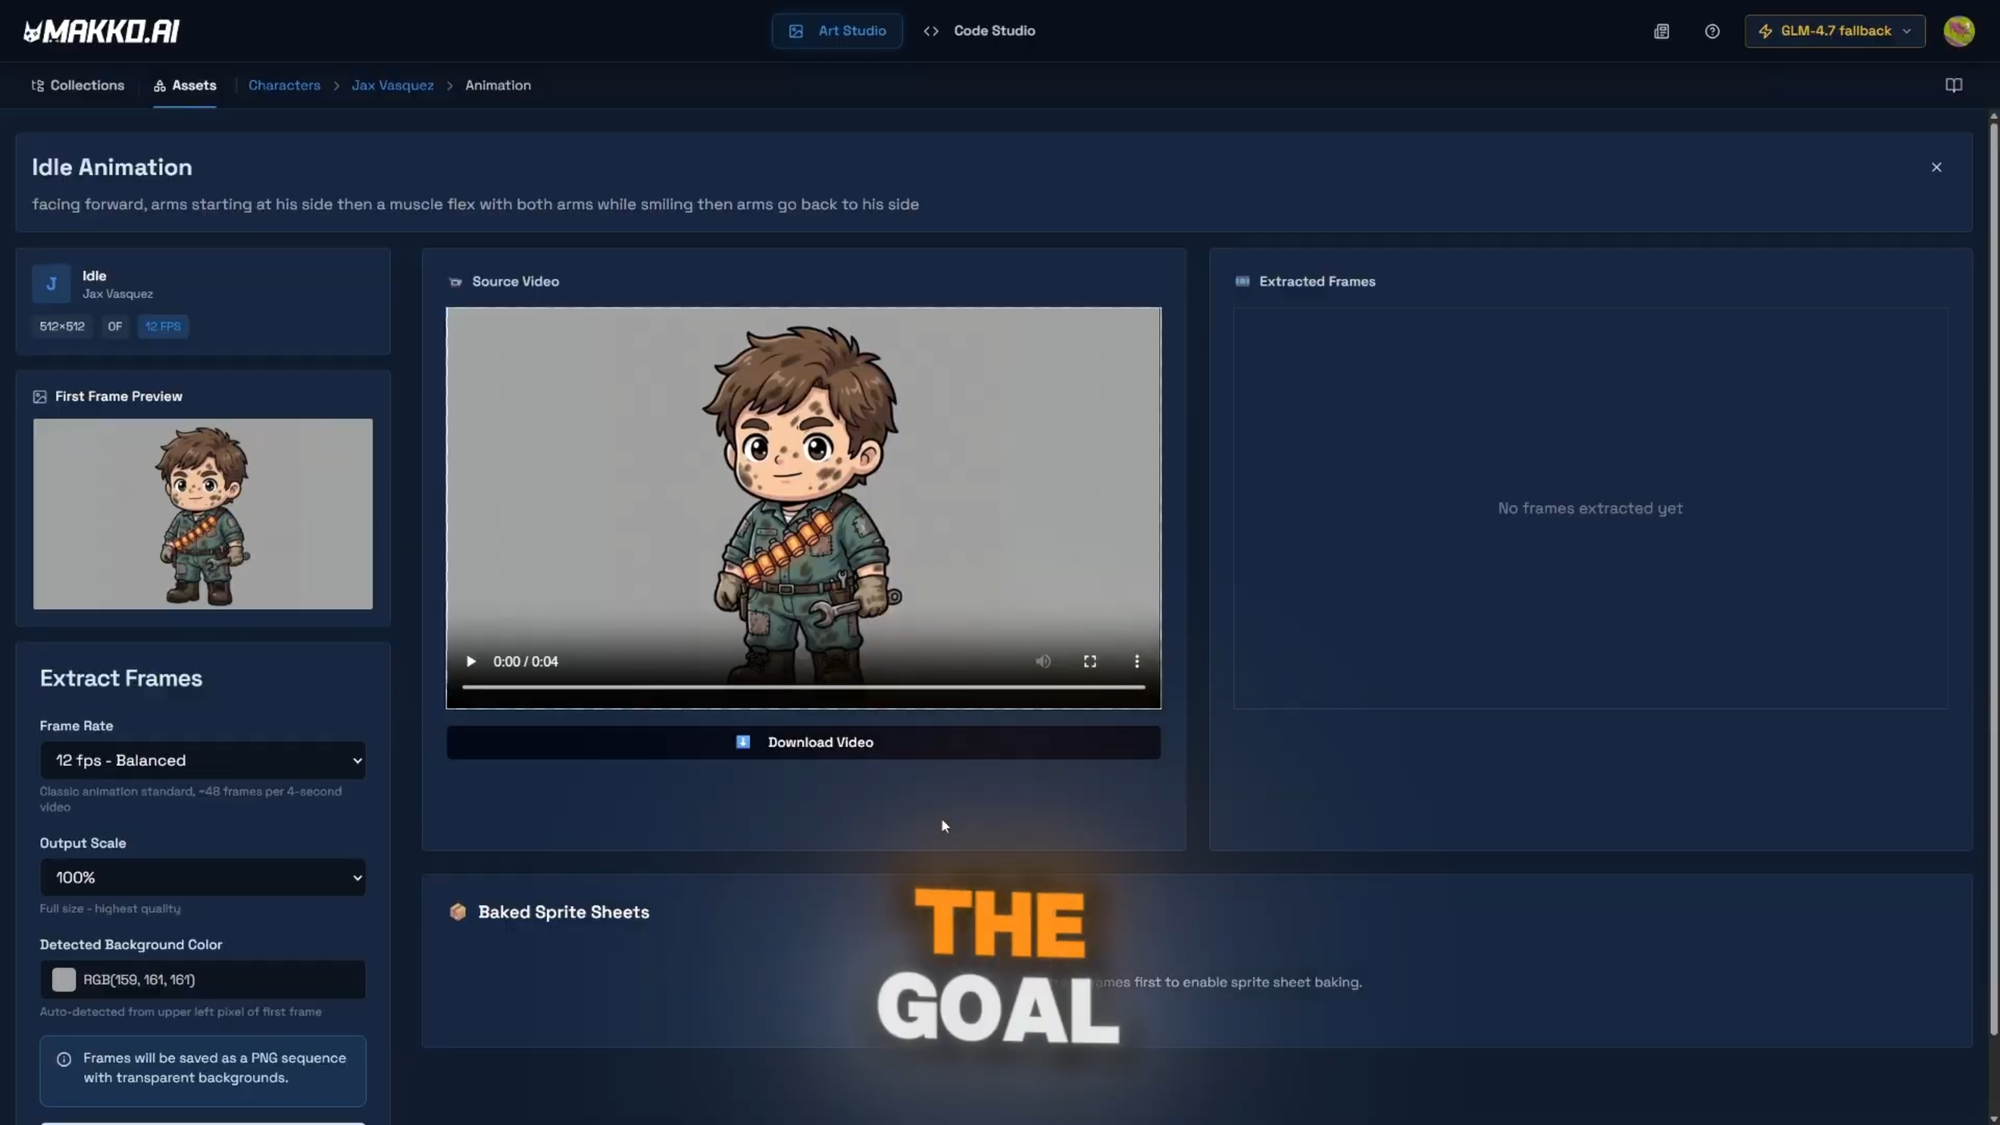
Step 5: Animate
From the Character Details page, animation states are created for each movement Jax needs in the game: Idle, Run, Jump, Attack. Each animation is generated using Jax's concept art as visual reference, which keeps the animated version consistent with the still character already built. The AI is not interpreting the animation prompt from scratch. It is animating the specific character already defined in the Collection.
After each animation generates, the frames are extracted and cleaned in the frame editor. Raw generated animations often include transition frames at the start or end that do not belong in a seamless loop. Those are removed, the loop is confirmed clean, and a sprite sheet is created. For Jax, four animation states cover the core gameplay requirements: idle, run, jump, and a combat action.
Every animation state that would have required a dedicated animator, a separate application, and hours of manual frame work was produced inside the same tool that generated the still character. No context switching. No file conversion. No waiting on a contractor.
Step 6: Into the Game
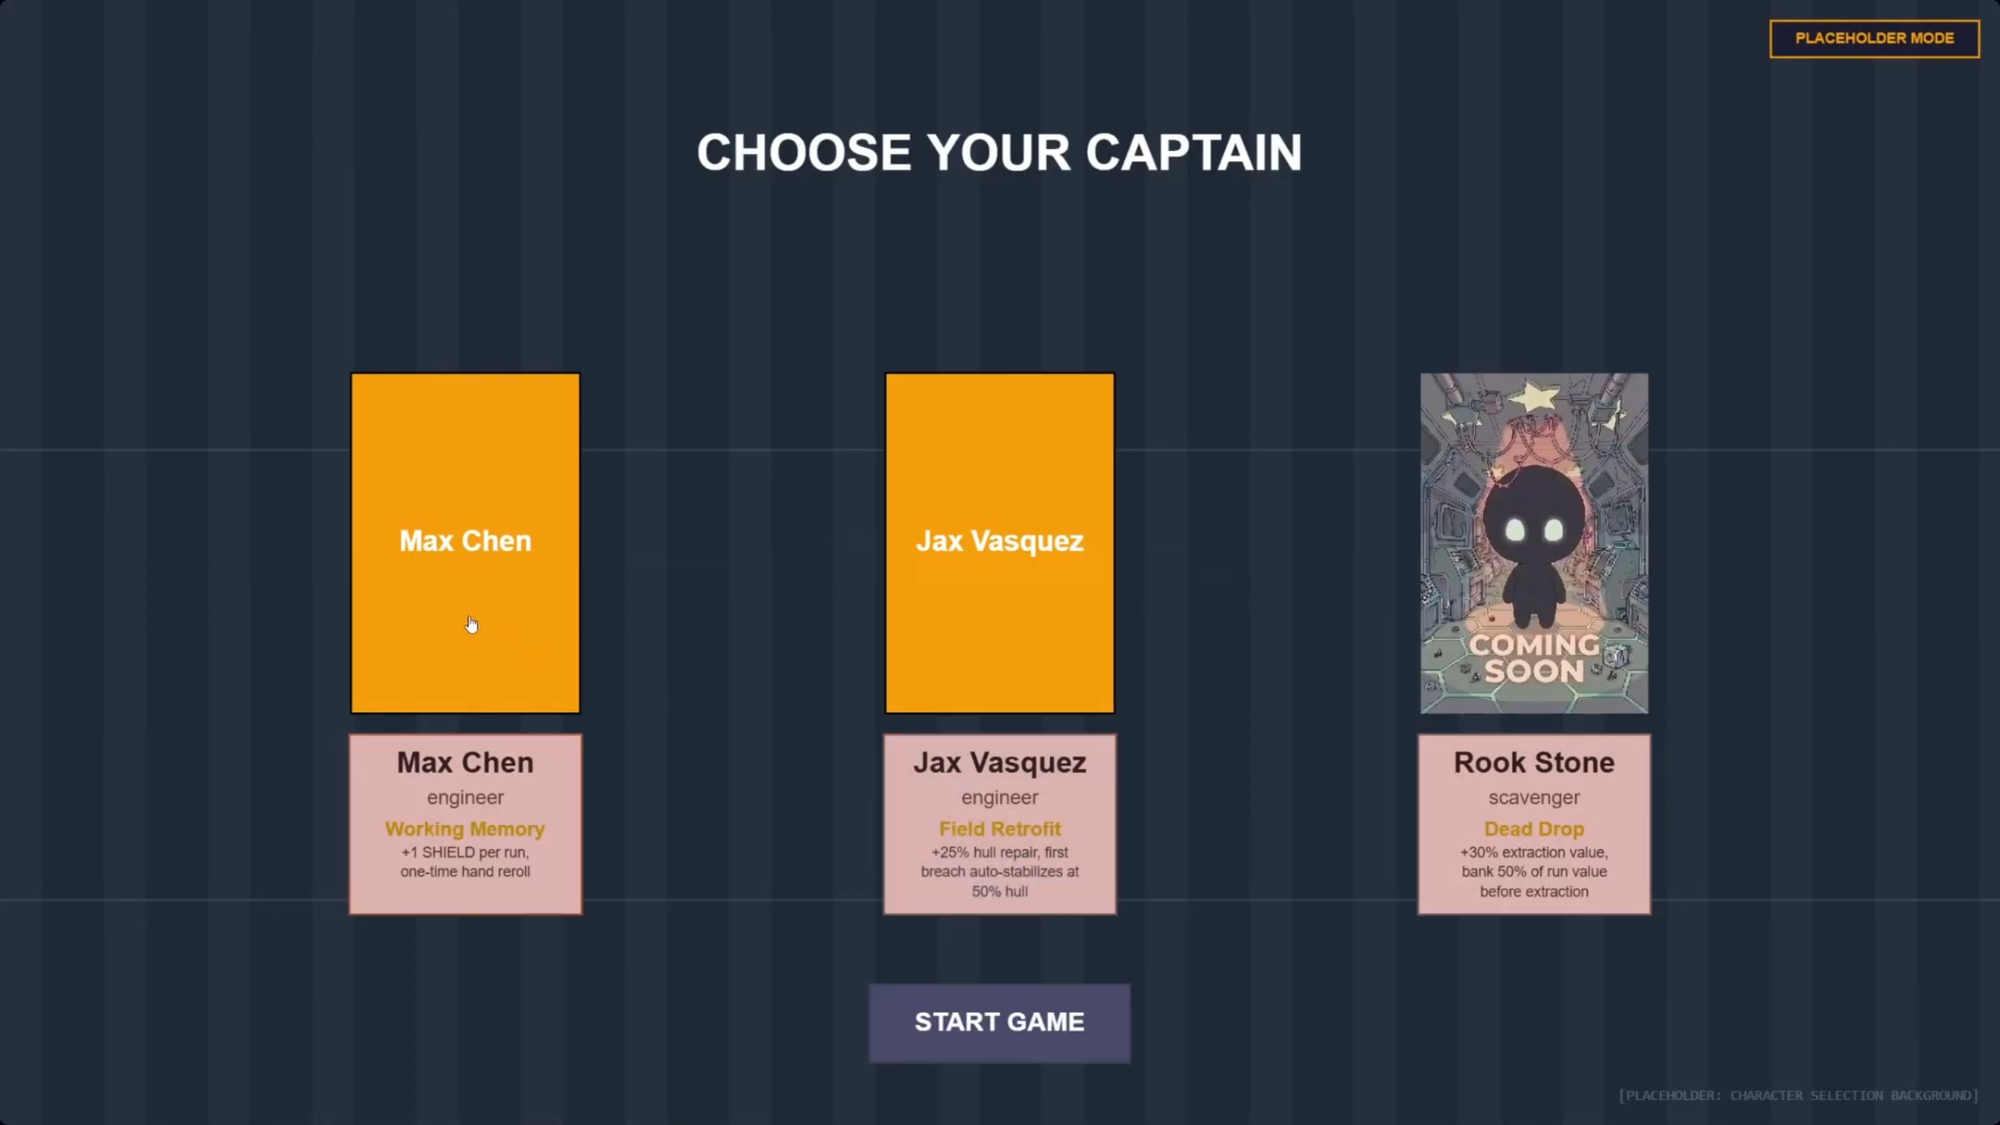
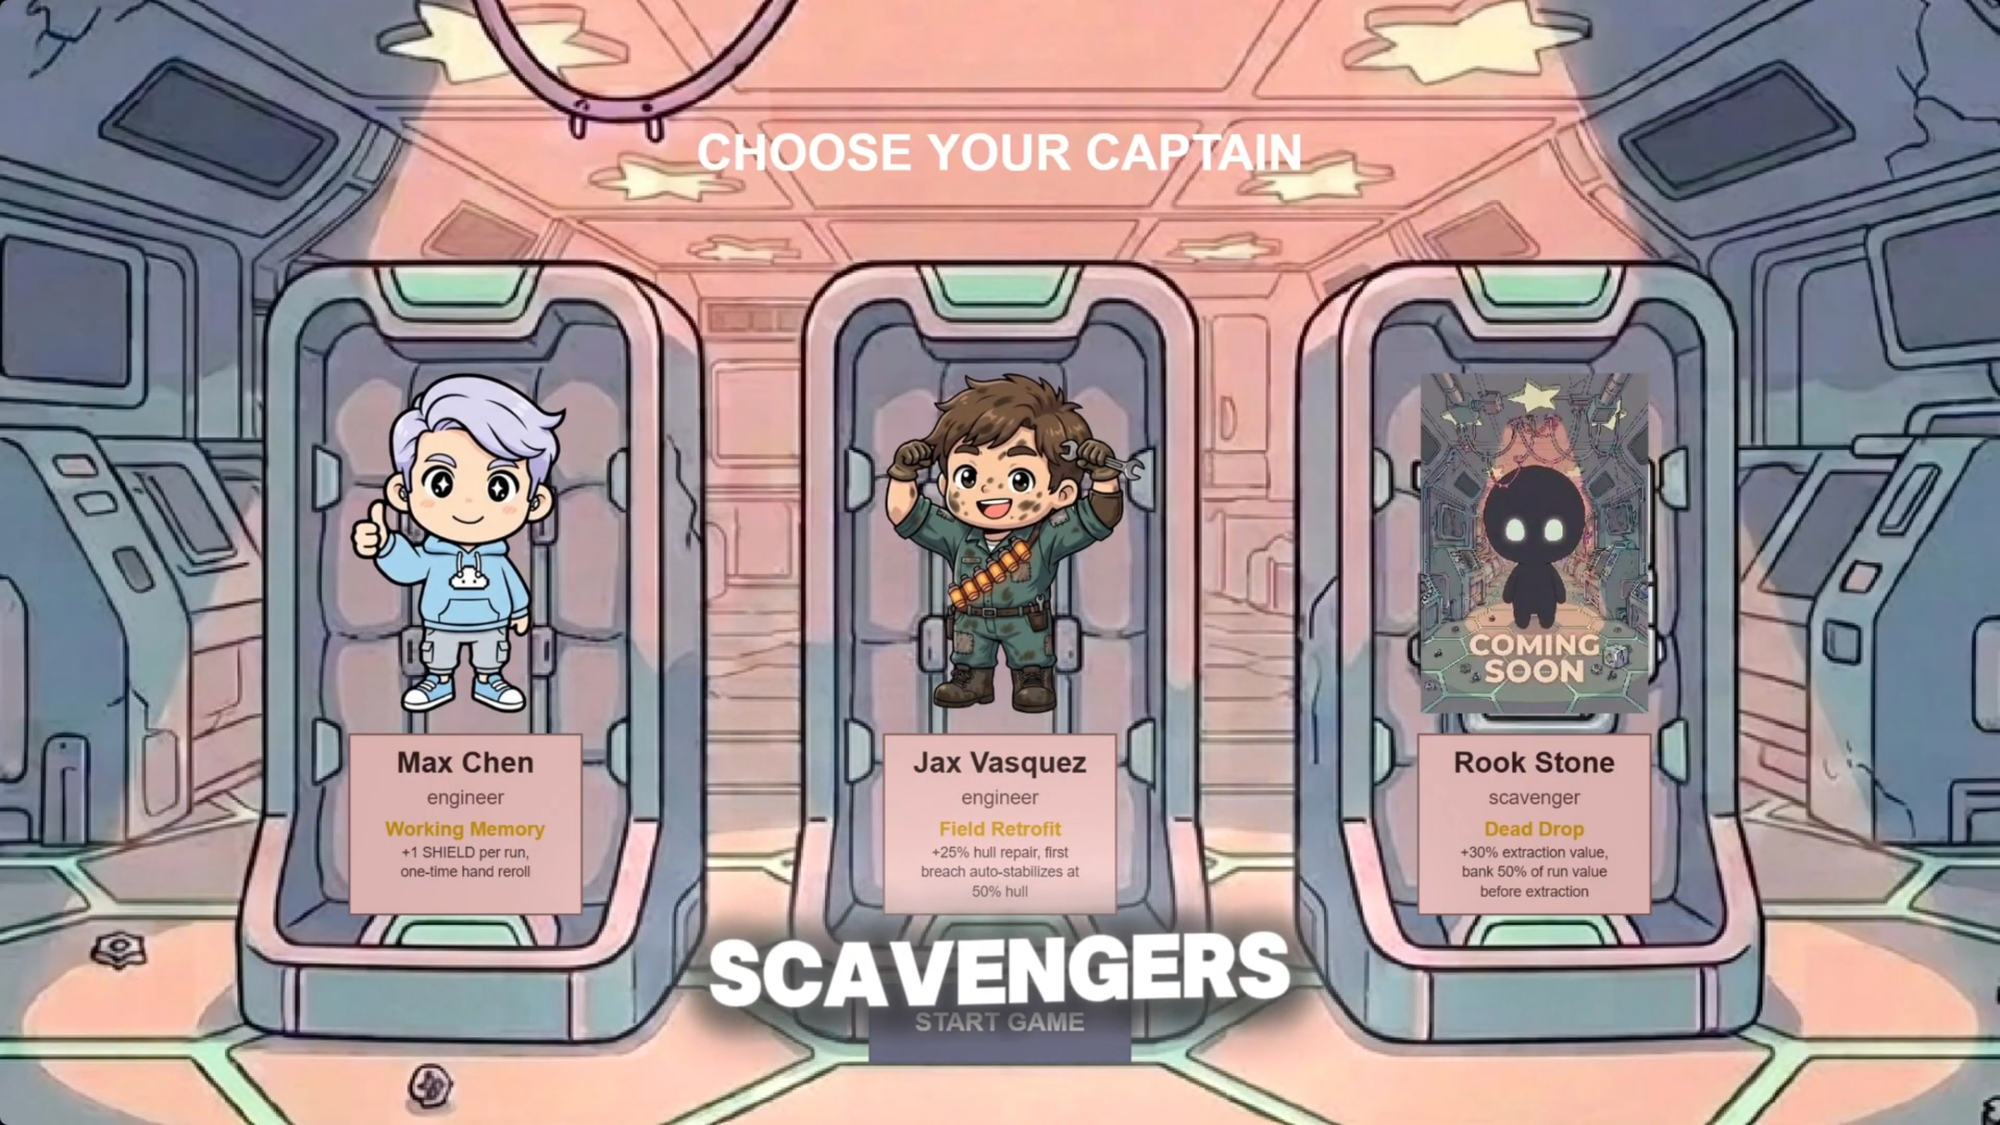
With animations complete, a Character Manifest is created for the Sector Scavengers project. The manifest packages all animation states and connects them to the game. In Code Studio, the Asset Library already contains everything built in Art Studio. Jax is added to the project through the Asset Library using the Add to Project button, and the Rebuild button recompiles the game.
The before was a Code Studio project with working game logic and no art. The after is Jax: fully built, in the character selection screen, idle animation playing. The entire production, concept art through game integration, happened inside one platform, from one text description, with zero drawing and zero animation software.
Why Consistency Across a Full Game Is the Hard Part
One character is not a game. A real game needs a roster of characters, a set of environments, objects, props, and animations, all of which need to look like they were made by the same artist with the same vision. This is where most general AI image tools fall short for game development: they produce strong individual assets with no guarantee the next one matches. A character generated today and a background generated next week can look like they came from different projects, because they were generated without a shared visual anchor.
The Collections system solves this structurally. Every generation inside a Collection references the same concept art foundation. The AI is not interpreting each new prompt from scratch. It is working from an established visual anchor that does not expire between sessions. Close Makko, come back a week later, and the AI still knows what the game looks like. The style does not drift because the reference does not change.
For Sector Scavengers, every asset in the game was built inside the same Collection. Jax, every other character, the ship designs, the background environments: all of them reference the same concept art. The game looks like a designed world rather than a collection of separately sourced assets because it was built that way, from one consistent visual foundation.
This is the full picture of what removing the art barrier actually means for a solo developer. It is not just the ability to generate one character. It is the ability to produce a complete, consistent visual world for an entire game, from a single platform, without drawing skills, without hiring anyone, and without managing visual consistency manually across dozens of separate generations.
The art barrier is a real reason projects die. It also has a specific, practical answer. That is rarer than it sounds in indie game development, and it is worth using.
Frequently Asked Questions
Why do so many solo developers never finish their games?
The most common reason is the two-discipline problem. Finishing a game requires both programming and art skills. Most solo developers are strong in one and weak in the other. When the project reaches the point where the missing skill becomes unavoidable, it stalls. For developers who cannot draw, the art barrier is the single most common point where projects stop: not because of motivation, but because of a specific production gap with no clear path forward.
Can a developer make game art without drawing skills?
Yes. Makko's Art Studio generates game-ready characters, backgrounds, objects, and animations from text descriptions. No drawing required. Assets arrive with transparent backgrounds, animation-ready frames, and the correct file format for a game engine. The skill it amplifies is the ability to describe what you want clearly: not the ability to draw it.
How does Makko keep generated art consistent across a full game?
Through the Collections system. A Collection stores concept art that serves as the visual anchor for every generation inside it. Every character, background, and prop created in the same Collection references that same foundation. Close Makko, come back a week later, and the AI still knows what your game looks like. The style stays consistent across the entire game without manual management between generations.
What is the full workflow for building an animated game character in Makko?
Create a Collection, generate concept art to establish the visual world, create a Characters sub-collection, describe the character in a prompt, generate and iterate until it is right, save to reference art, generate the Reference Sheet (front, side, back views), create animation states from the Character Details page, build a Character Manifest for the game project, and import through the Asset Library in Code Studio. The entire process stays inside one platform with no file transfers between tools.
For more devlogs, tutorials, and live builds, visit the Makko YouTube channel.
Related Reading
- AI Character Generator for Games: How to Create Consistent 2D Characters With AI
- How to Use Makko AI Collections: Build Consistent Game Art With AI
- What Is Makko Art Studio? The AI Game Asset Generator Built for Game Developers
- How to Make a Game Without Coding: The Complete AI Walkthrough
- C# vs Intent: Why Manual Scripting Stalls Indie Progress
- No-Code Roguelike: How I Shipped a Full AI-Generated Game in 10 Days