AI Game Development as a Brick-by-Brick System: Scene Architecture, Debugging, and Sprite Animation Discipline

Many creators approach AI game development with the same expectation they bring to a text generator: describe the end result and receive a complete output. In game development, that model does not work. Even in an AI-native environment, a project is built brick by brick. Each scene, mechanic, and character is a component that depends on the structural integrity of what came before it. For a full look at how agentic AI automates game development across that entire process, see the dedicated roadmap.
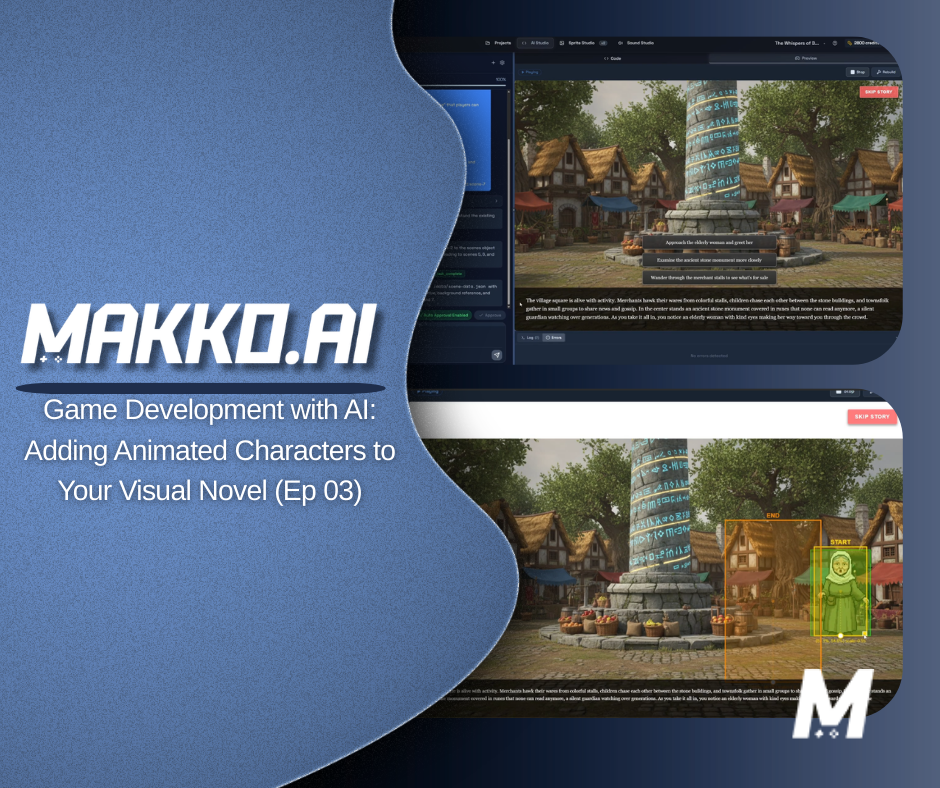
This episode of the interactive visual novel series demonstrates that principle in practice. Working through scene expansion, agentic AI debugging, and sprite animation integration, the walkthrough shows what professional AI-native game development actually looks like: structured, iterative, and disciplined at every layer.
Scene Expansion as Architectural Validation
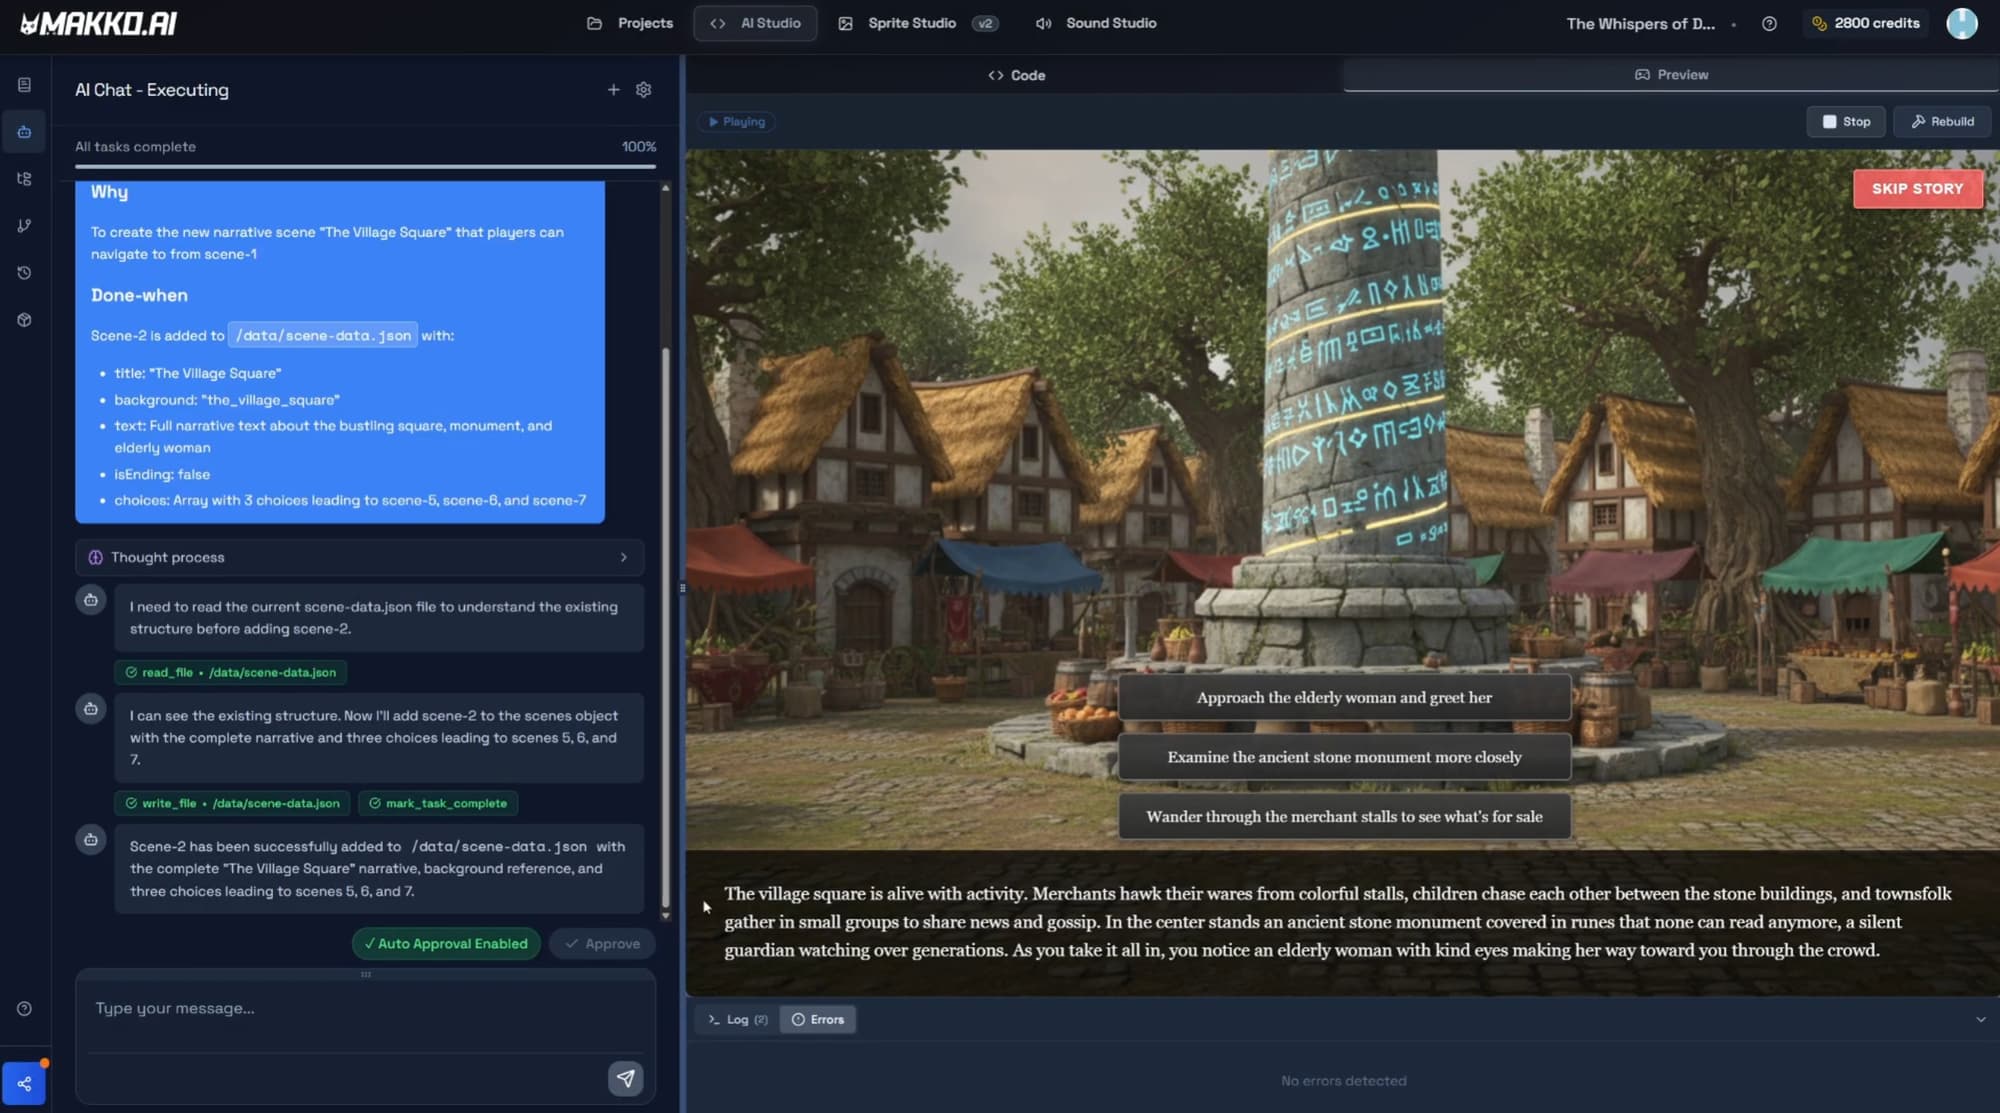
Adding scenes 2, 3, and 4 to the project was not about duplicating story content. It was about validating the integrity of the underlying scene structure before committing more work on top of it. In a multi-scene visual novel project, each scene is a dependent component. If the naming conventions, asset references, or state handoffs between scenes are inconsistent, every scene added after the break point inherits the instability.
Plan Mode is the correct tool for scene expansion. Adding a new scene is a structurally significant change: it introduces new state variables, new asset references, and new dependencies on the naming conventions of existing scenes. Plan Mode generates a full breakdown of what the AI intends to do before a single file changes, which lets the creator review and correct the approach before execution. The result is that each new scene inherits stable mechanics from the ones before it.
The syntax errors encountered during this phase were not failures of the AI. They were reminders that system references must remain consistent as the project grows. When background assets failed to load, the cause was a naming convention mismatch between how the asset was referenced in code and how it was stored. Disciplined naming from the start of a project is not a stylistic preference; it is a structural requirement that pays dividends every time a new scene is added.
Manual Saves and State Discipline
Before modifying global behavior such as aspect ratio enforcement across all scenes, a manual checkpoint was created. This reflects a core professional discipline: protect a stable state before introducing structural change. The two save types in Makko serve different purposes and both matter.
Automatic saves are generated by the AI after every prompt or plan execution. They allow reverting to the state before any specific AI action, which means no individual change is irreversible. Manual saves are user-generated checkpoints created at intentional milestones, particularly before risky work: a new scene, a global behavior change, a system refactor. The correct habit is to create a manual save at every stable state you would want to return to if the next phase of work goes wrong. Clear, descriptive save names prevent confusion when you need to find a specific checkpoint later.
State awareness-driven development only works when the creator is also maintaining state discipline. The AI tracks project context across iterations; the manual save habit ensures a recoverable checkpoint exists at every point where the project is known to be working correctly. AI game development without state discipline leads to drift. The two work together.
Using AI as a Design Analyst, Not an Asset Factory
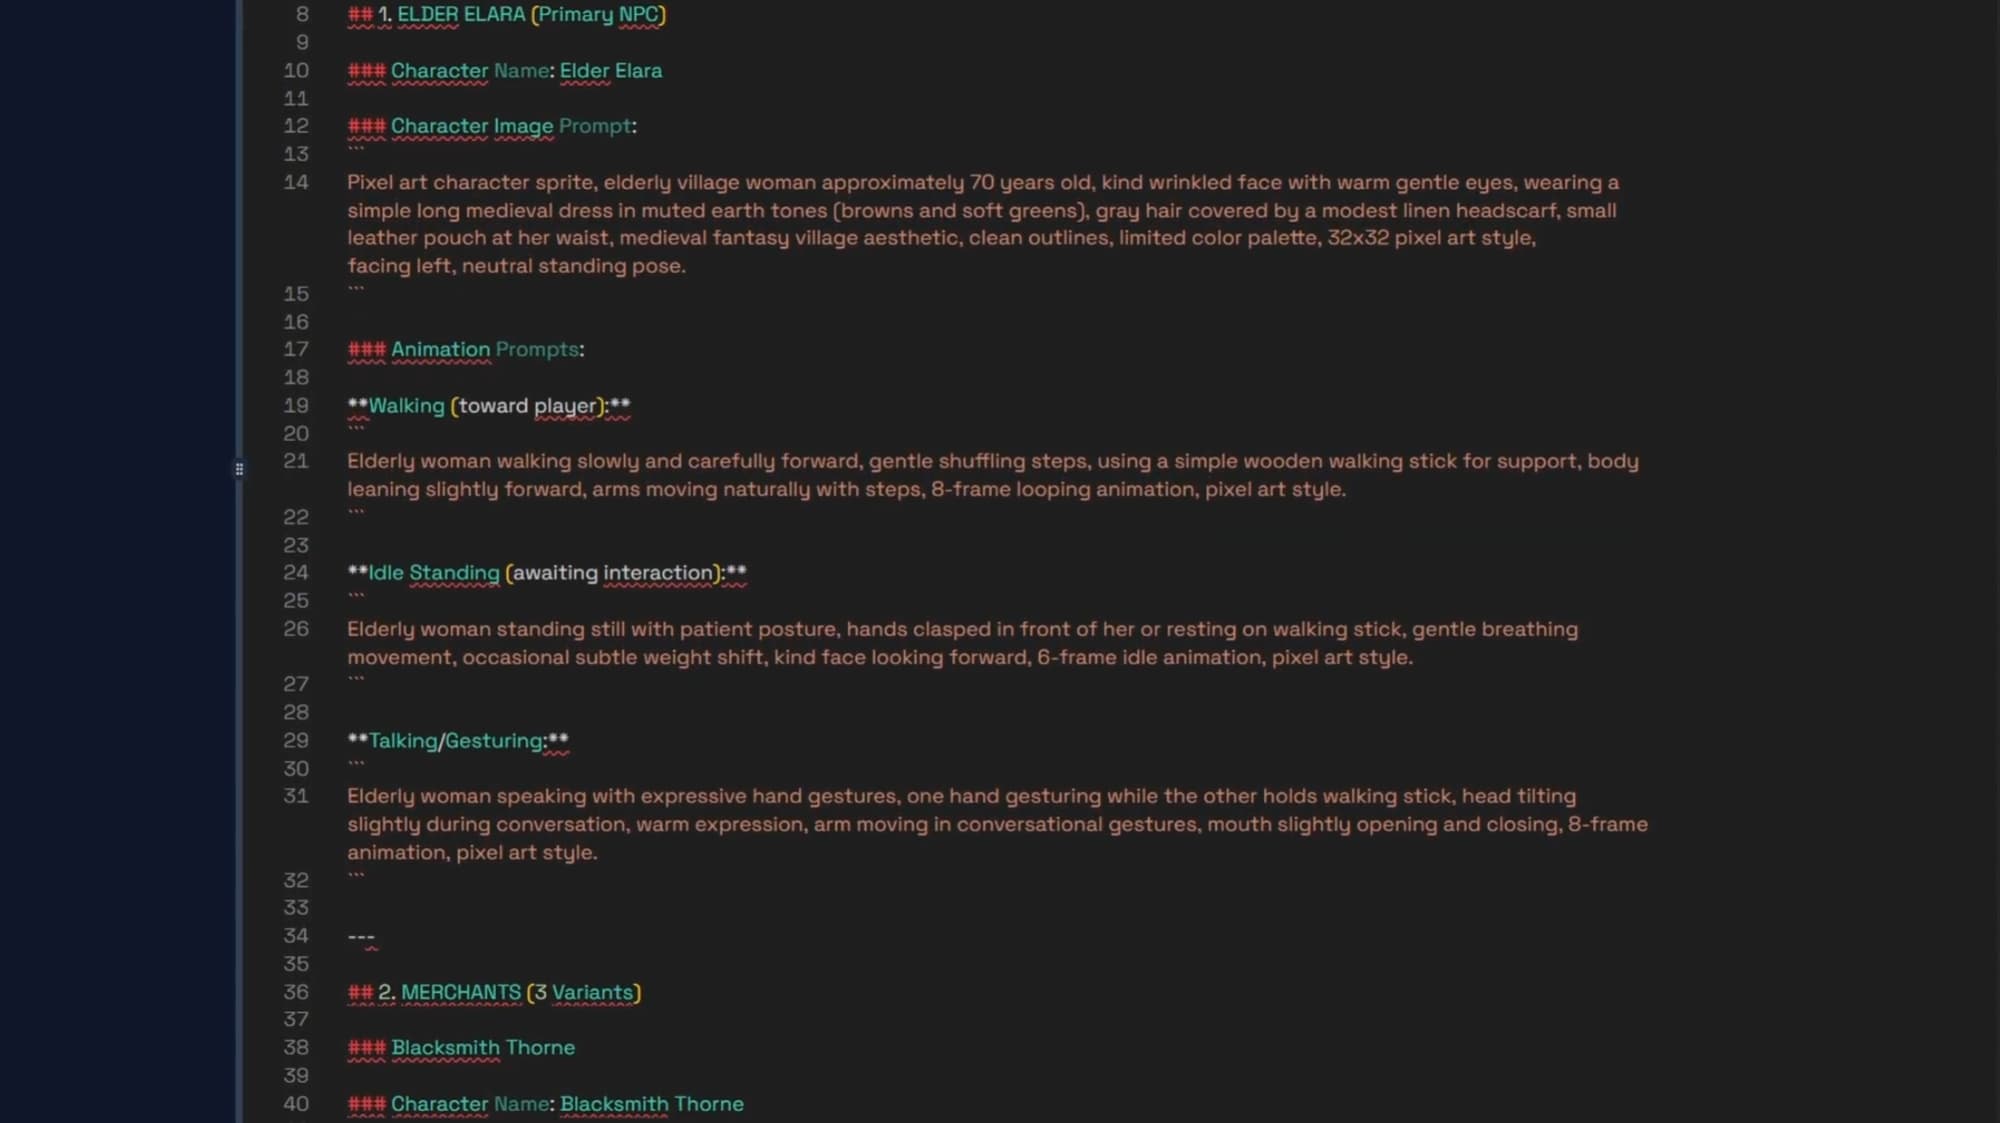
Rather than manually brainstorming character ideas for the market scene, the narrative text was fed to the AI to generate character suggestions that fit the story context. This is agentic AI used as a design collaborator, not a content factory.
The suggestions generated from the narrative included an elderly main NPC with expressive animations, merchants to simulate a busy market environment, and children and townsfolk to create environmental depth. None of these required the creator to brainstorm from a blank page. The AI drew from the story's own context to propose characters consistent with the world already established.
An AI sprite generator that produces assets without design reasoning produces assets that may or may not fit the project. The more useful application is using the AI to reason about what should be created before creating it. The character suggestions here were a design output, not just an asset output. That distinction matters for the quality of what ends up in the game.
The lesson is not that AI generates sprite animations. The lesson is that AI augments design reasoning. Generation comes after the design decision, not instead of it.

Sprite Animation Integration as System Coordination
Adding characters into a scene revealed a professional reality that applies at every skill level: implementation often does not work the first time. That is not a sign of a broken process. It is a sign that the process is being tested, which is exactly what it is there for.
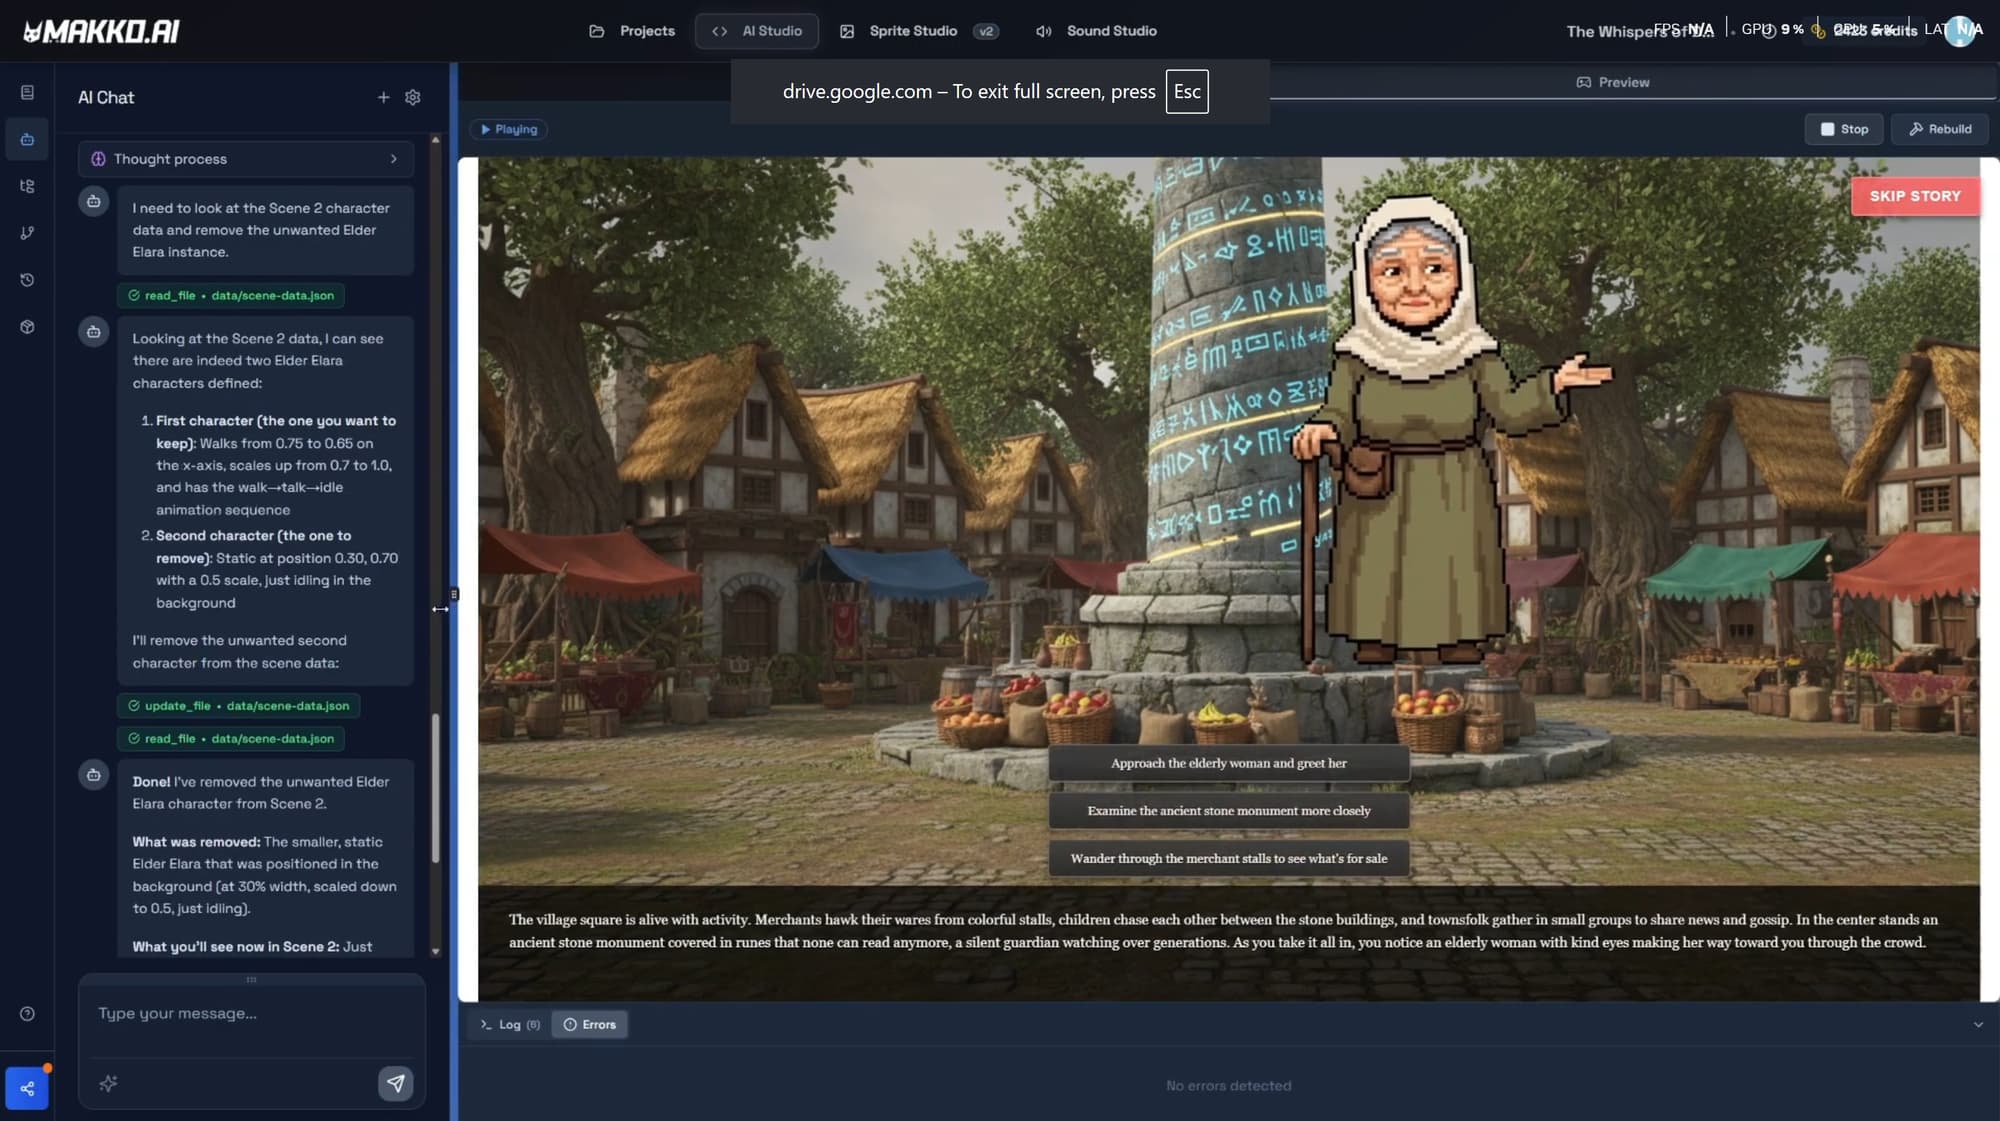
Missing JSON references in the sprites-manifest.json file prevented animations from rendering. This file contains the full character configuration: default state, position, dimensions, scale, sprite sheet URL, and section values per character entry. When this file does not reflect the current state of the manifest in Art Studio, the game engine does not have what it needs to place the character correctly. Duplicate instances introduced conflicting entries for the same character and caused unintended behavior.
Both issues were resolved through the correct propagation workflow: re-adding the manifest via the Asset Library using the Add to Project button, then recompiling the game using the Rebuild Button. This step is mandatory. A character updated in Art Studio does not automatically appear correctly in the Code Studio preview. The Rebuild Button recompiles the entire game from scratch. The Play Button in the preview window recompiles JavaScript only and is not sufficient for manifest changes.
This aligns with the principles in C# vs Intent: structured iteration replaces manual chaos. Debugging a missing JSON reference through targeted diagnosis and the correct rebuild workflow is faster and more reliable than adjusting values experimentally until something works.
Precision Over Guesswork: Debug Boxes and Animation Alignment
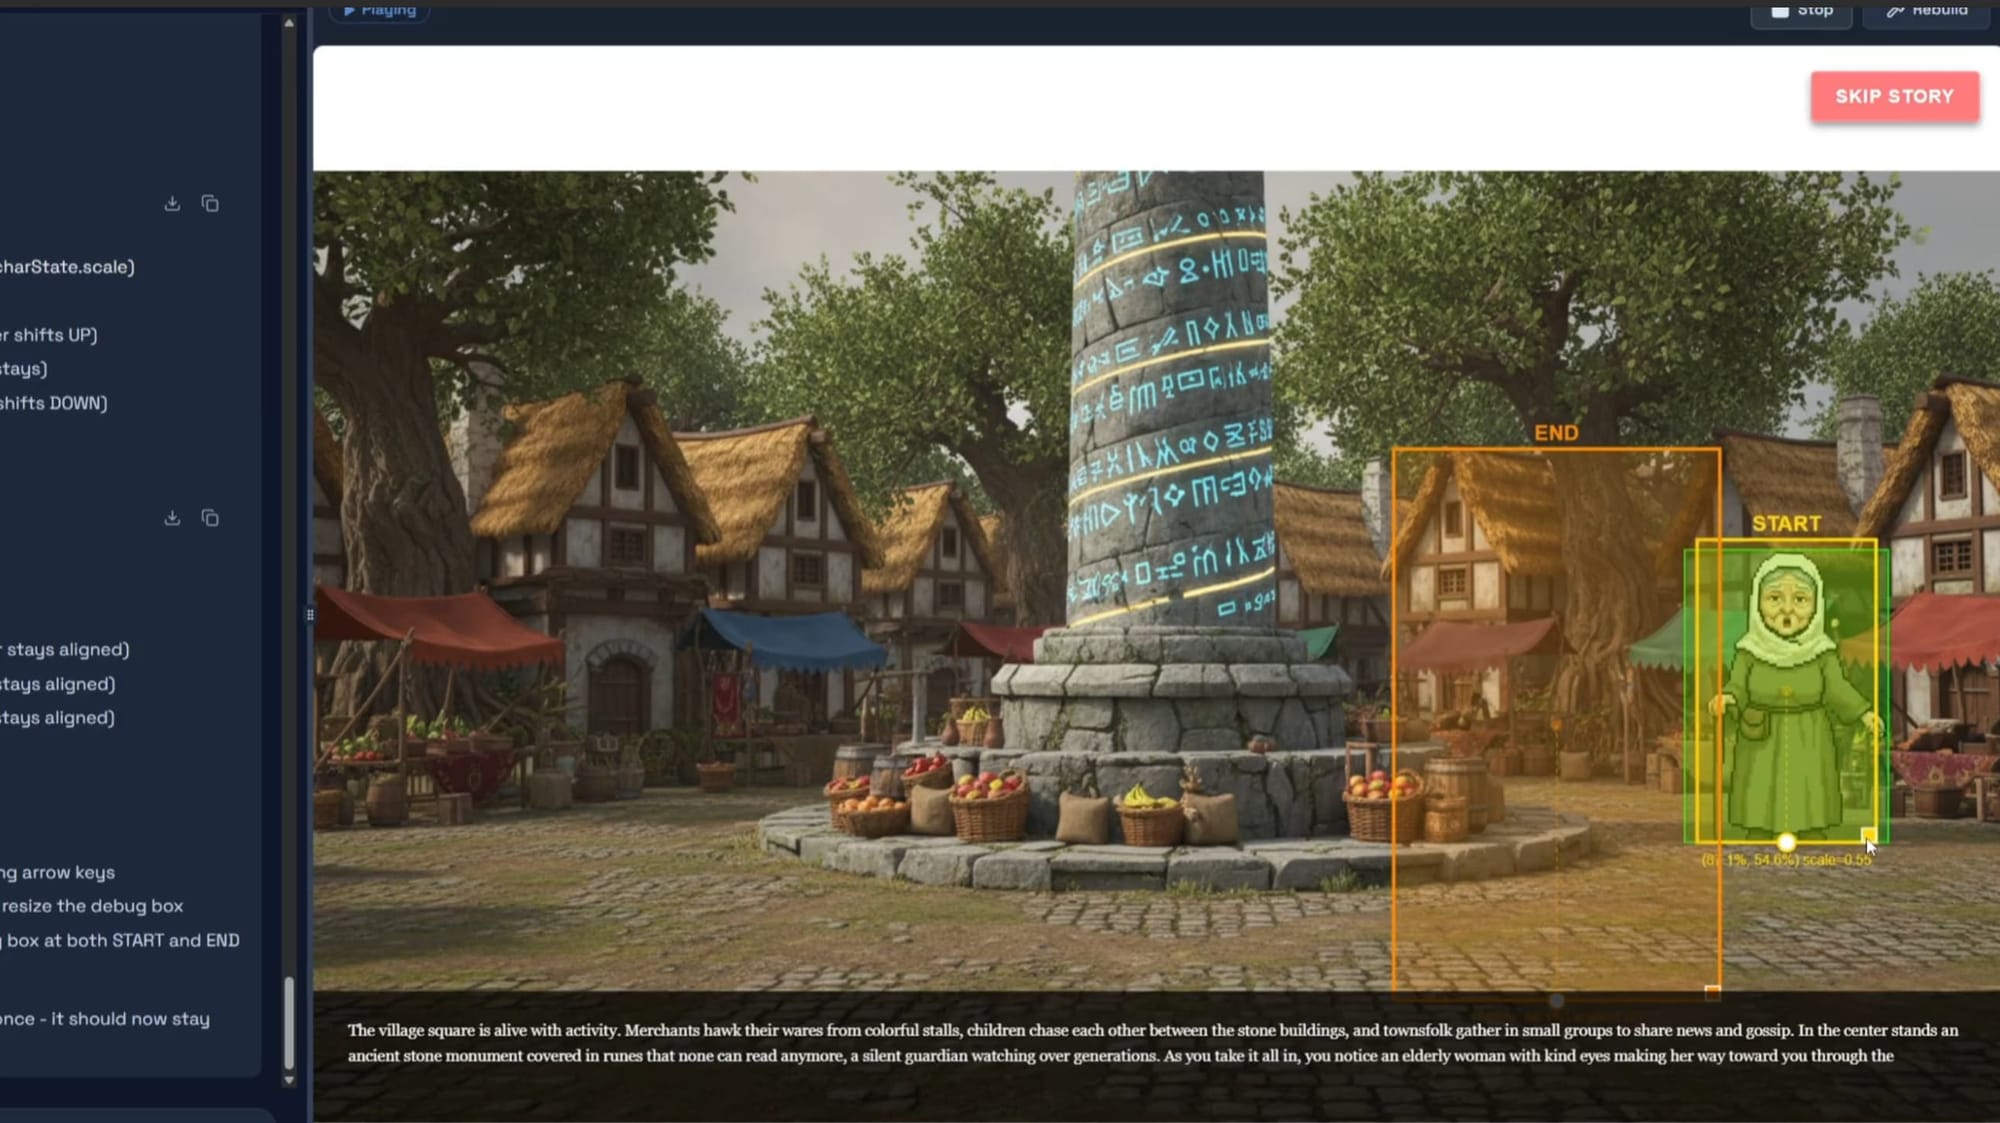
Rather than nudging sprite animation coordinates blindly until the character appeared in roughly the right position, debug boxes were introduced via Code Studio chat to surface precise positioning data. Start and end positions were logged with coordinates, anchor points were aligned to the debug box centers, and scale was adjusted through visible constraints. This transforms visual alignment from an approximation exercise into a measurable process.
Alignment is configured through the Alignment Tool inside each character manifest. Three settings determine how the game engine places and interprets the character: the Anchor Point, which defines the single pixel coordinate the engine uses to position the character in the world; Scale, which adjusts the character's size relative to the scene; and Hitbox, which defines the active collision region. For a visual novel character portrait, anchor point and scale are the primary concerns.
One important detail: the Alignment Tool displays only the first frame of each animation. The hitbox drawn there applies across the full animation, so it should cover the character's majority body position throughout, not the maximum reach at any single frame. A hitbox sized to cover an extended arm will create phantom collisions for every frame where the arm is not extended.
When alignment failed in this session, the cause was an outdated manifest, not wrong coordinate values. The fix was re-adding the manifest and running the Rebuild Button, not adjusting numbers. This reveals the deeper asset pipeline rule: when something looks wrong visually, the first question is whether the underlying data is current. Correct data first, then alignment tuning. Asset updates must propagate intentionally. Nothing updates automatically.
The Professional Lesson From This Episode
By this stage in the series, a clear pattern has emerged. Scenes expand predictably. Aspect ratio remains stable across scenes. Sprite animation integrates cleanly. Debugging becomes controlled rather than chaotic. None of this happened because the AI got more capable between episodes. It happened because the architectural discipline established in earlier episodes is paying forward into every subsequent one.
Every phase of this session: scene expansion, save discipline, design analysis, animation integration, alignment debugging, illustrates the same underlying principle. AI-native game development is a system construction process. The AI handles coordination and execution; the creator handles architecture, validation, and the decisions about what should exist and why. Neither side works well without the other.
The creators who finish games in this environment are not the ones who find a prompt that generates everything at once. They are the ones who build iteratively, validate each layer before adding the next, maintain state discipline through manual saves at every stable milestone, and treat debugging as a diagnostic process with a correct path rather than a guessing exercise. This is what scalable AI game development looks like. Not magic. Architecture.
Frequently Asked Questions
Why does AI game development need to be built iteratively rather than all at once?
AI game development is a system construction process, not a single generative event. Each scene, mechanic, and character is a component that depends on what came before it. Building iteratively, with each addition validated before the next begins, keeps the project coherent and debuggable. Attempting to generate a complete game from a single prompt skips the architectural validation that makes a project stable. The result is typically a demo that works in isolation but breaks under real gameplay conditions.
When should you use Plan Mode versus Fast Mode for scene expansion?
Plan Mode is the right choice for structurally significant changes: adding new scenes, introducing new characters, modifying systems that multiple files depend on. Plan Mode generates a full breakdown of what the AI intends to do before a single change is made, which lets the creator review and correct the approach before execution. Fast Mode is the right choice for well-scoped changes: adjusting a value, fixing an isolated bug, changing a color. Scene expansion in a multi-scene visual novel project is a Plan Mode task.
Why do sprite animations sometimes fail to appear after a manifest update?
When a character manifest is updated in Art Studio, the update does not automatically propagate to the Code Studio project. The updated manifest must be re-added via the Asset Library using the Add to Project button, then the game must be recompiled using the Rebuild Button before the character appears in the preview. Skipping the rebuild is the most common reason animations fail to render after a manifest change. The Play Button recompiles JavaScript only and is not sufficient for manifest updates.
What is the difference between automatic saves and manual saves in Makko?
Automatic saves are generated by the AI after every prompt or plan execution and allow reverting to the state before any specific AI action. Manual saves are user-generated checkpoints created deliberately at stable milestones, particularly before risky structural work. Create a manual save before any change that could affect multiple systems: a new scene, a global behavior change, or a system refactor. Clear, descriptive save names prevent confusion when you need to find a specific checkpoint later.
How do you align sprite animations correctly in a Makko game?
Sprite alignment is configured through the Alignment Tool inside each character manifest. The tool controls three settings: Anchor Point, which defines the single pixel coordinate the game engine uses to place the character in the world; Scale, which adjusts the character's size relative to the game world; and Hitbox, which defines the active collision region. The Alignment Tool displays only the first frame of each animation, so the hitbox should cover the character's majority body position across the full animation, not the maximum reach at any single frame. Before tuning any values, confirm the manifest has been re-added and the Rebuild Button has been run.
For the full video walkthrough and more build sessions, visit the Makko YouTube channel.
Related Reading
- Visual Novel Tutorial Episode 1: Getting Started With Makko AI
- How to Add Animated Characters to a Game Using Makko
- Plan Mode vs Fast Mode: Calibrating AI Reasoning
- State Awareness vs One-Shot Prompts: Why Your AI Game Logic Keeps Breaking
- Sprite Animation Alignment: Anchor Points, Scale, and Using Characters in Multiple Games
- C# vs Intent: Why Manual Scripting Stalls Indie Progress