Sprite Animation Workflow: Asset Hygiene, Anchor Points, and Getting Game Characters Right
A complete weekly breakdown of Makko's sprite animation workflow, covering anchor points, asset pipelines, jump animation, the action layer, and why your character's emotional pacing starts with frame count.

Most sprite animation problems are not art problems. The frames are clean, the motion reads correctly, the character looks right in isolation — and then something breaks the moment it enters a game. The character floats above the ground. An anchor point is off by a handful of pixels. A change made to fix one game silently breaks another. These are pipeline problems, and they compound fast when the workflow underneath them is not clean.
This week on the Makko YouTube channel, every piece of content pointed at the same underlying discipline: understanding your sprite animation workflow well enough that the art you create actually behaves correctly inside the game. From anchor points and manifest configuration to asset hygiene, the action layer, jump animation timing, and how frame count drives emotional pacing — this is the full breakdown.
Why Your Game Character Is Floating (And How to Fix It)
The most common reaction when a character floats above or sinks below the ground is to blame the art. The frames look misaligned, so the sprite must be wrong. In almost every case, the art is fine. The problem is that nobody told the game engine where the character's anchor point is, how large she should be relative to the world she inhabits, or whether those settings should apply globally or only to one specific game configuration.
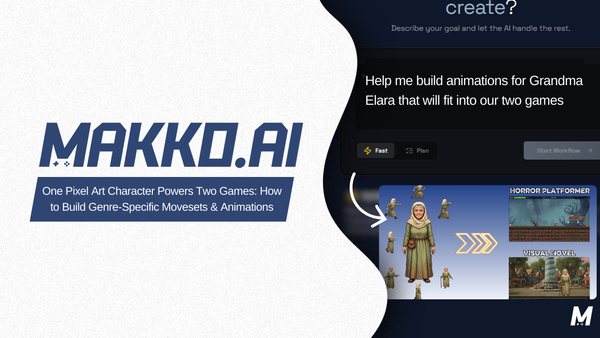
This week's long-form video goes deep on Makko's Alignment Editor — the tool inside AI Studio that controls scale, anchor points, and manifest configuration for every character in your pipeline. The walkthrough follows Grandma Elara, a character running across two completely different game contexts: a Horror Platformer built on a 32x32 pixel tile grid, and a Visual Novel that uses the same character as a large portrait asset.
Scale is the first variable. A character imported at full resolution into a 32x32 tile world will look completely out of proportion — taking up vertical space that breaks the visual logic of the environment. The Alignment Editor lets you set scale per manifest, meaning the same base character can be sized correctly for a platformer and sized entirely differently for a visual novel, with neither configuration touching the other.
The anchor point is the second variable and the one responsible for the floating problem. The anchor point is the single pixel coordinate the game engine uses to determine where a character physically meets the world. When it defaults to the center of the sprite, the engine places the character's midpoint at the platform surface — which means the feet end up below it. Moving the anchor point to the bottom-center of the character's feet corrects this. The engine then places the feet at the surface and the character looks grounded.
The deeper concept the video covers is the distinction between a manifest-specific edit and a global edit. A manifest-specific edit applies only to the game configuration currently selected. Change the anchor point in the Horror Platformer manifest and the Visual Novel manifest is completely untouched. A global edit applies to the base character itself, meaning every manifest that references that character inherits the change. Confusing these two is one of the most common mistakes in a multi-game asset pipeline — you think you are fixing one game and you silently break every other game using the same base asset.
Understanding which edit scope you are working in, and applying it deliberately every single time, is what separates a clean professional pipeline from one that creates unpredictable problems across projects.
Animation Pacing Is an Emotional Decision, Not a Technical One
Frame count and playback speed are usually treated as technical settings — numbers you dial in after the animation already exists. This short reframes them as the primary creative decision in the sprite animation process, because the emotional response a player has to a character is almost entirely determined by how that character moves through time.
Horror games use fast, sharp frame transitions to create tension. A character snapping toward the camera in three frames feels sudden and unsettling in exactly the way the genre requires. Visual novels operate at the opposite end — slower, more deliberate movements that give atmosphere and narrative room to settle. Stretching the same motion across twelve frames instead of three makes it feel cinematic and controlled rather than threatening.
The practical implication when working with an AI animation generator is that playback speed and frame count should be set intentionally for the genre you are building, not left at defaults. The pixels are the same. The timing is what makes them feel like horror or poetry.
How to Generate a Jump Animation That Actually Feels Responsive
A jump animation that feels good in a platformer is not just a character moving upward and coming back down. It is three specific poses — the crouch before takeoff, the peak of the arc, and the recovery on landing — connected by only the frames that matter. Extra frames between those poses do not add smoothness. They add weight the player did not ask for, making the character feel slow to respond at exactly the moment responsiveness matters most.
The workflow starts with generating a side-view jump sequence using a clear prompt that captures the full arc of the movement. From there the process is about subtraction — identifying the three key poses and removing the filler frames that sit between them. A leaner sprite sheet with only the essential frames produces a snappier, more responsive character and keeps the asset from becoming unnecessarily heavy.
This is a repeatable process for any platformer animation using an AI animation generator — generate with intent, identify the key poses, trim everything else.
The Action Layer: What Turns a Sprite Into a Playable Character
A sprite without an action layer is a static image. It may have clean frames, correct proportions, and a complete animation set — but until behavior is assigned to it, it cannot respond to the player. The action layer is what bridges the gap between a character's intended movements and what actually appears on screen when a player presses a button.
In practice this means defining the logic for movements like jumping, attacking, and taking impact — then mapping those behaviors to specific animations so the engine knows which frames to play in response to which inputs. A character running, swinging, or breathing during an idle state is not just an animation playing back. It is the action layer executing a mapped behavior in response to a game event.
In AI game development, the action layer is where a character evolves from concept art into a playable asset. Getting it right is what determines whether a character feels alive or feels like a prop placed in the scene.
Asset Hygiene: One Master File, Every Game
Every time a character is duplicated instead of referenced from a single source, the pipeline accumulates debt. Two versions of the same asset means two files to update when something changes. Multiple games using slightly different versions of the same character means multiple opportunities for inconsistency, wasted storage, and the kind of visual drift that makes a game feel unpolished without anyone being able to explain exactly why.
Asset hygiene is the practice of maintaining one master asset in a clean, organized file and letting every game, scene, and update draw from that single source. When a change needs to be made — a corrected frame, a new animation state, a proportion adjustment — it happens once and propagates everywhere. The asset pipeline stays lean because it was never allowed to become cluttered.
This is the foundational principle behind the manifest system covered in this week's long-form. One character. Multiple game contexts. Zero duplication. The single source of truth is not just an organizational preference — it is what makes a scalable game development workflow possible without the pipeline collapsing under its own weight.
For detailed walkthroughs and live feature demos, visit the Makko YouTube channel.
Related Reading
- AI Character Creator vs Sprite Sheets: What's Actually Happening
- How to Add Animated Characters to a Game Using Makko
- Makko Sprite Studio Props Generator: A Pipeline Efficiency Guide
- Plan Mode vs Fast Mode: Calibrating AI Reasoning for Game Development
- AI Game Development as a Brick-by-Brick System: Scene Architecture, Debugging, and Sprite Animation Discipline
- Visual Novel Tutorial Episode 1: Getting Started With Makko AI